Chapter: Makar
Information relevant to the 13th chapter of Dragon Fire
the southern Guarded Land
hinterland
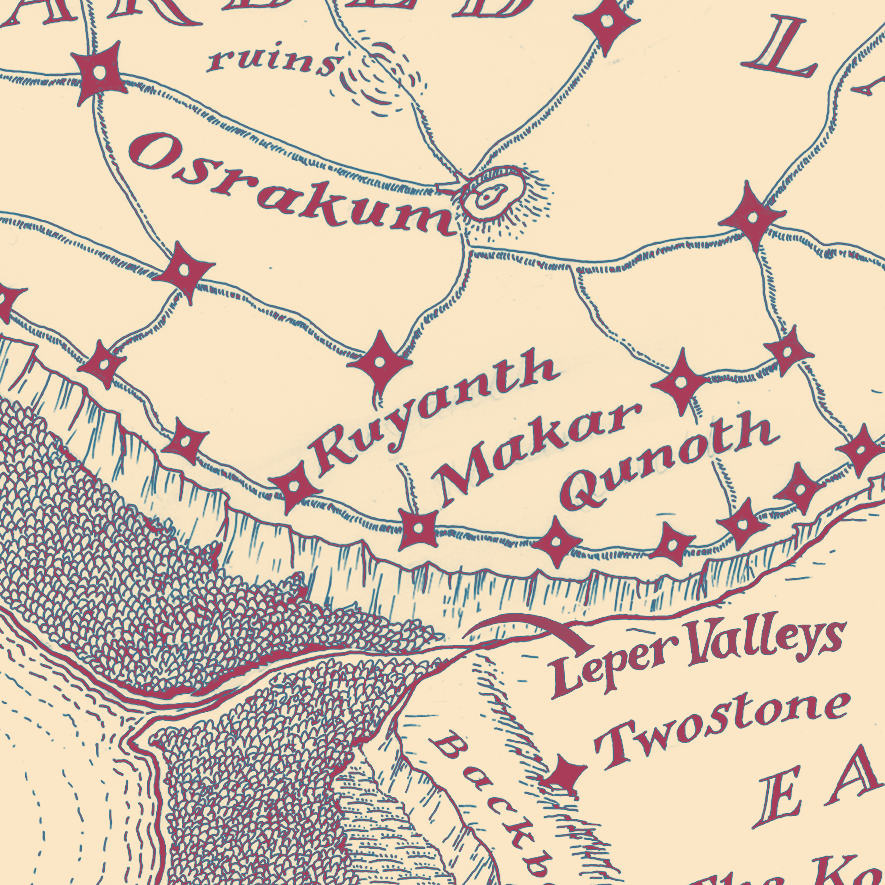
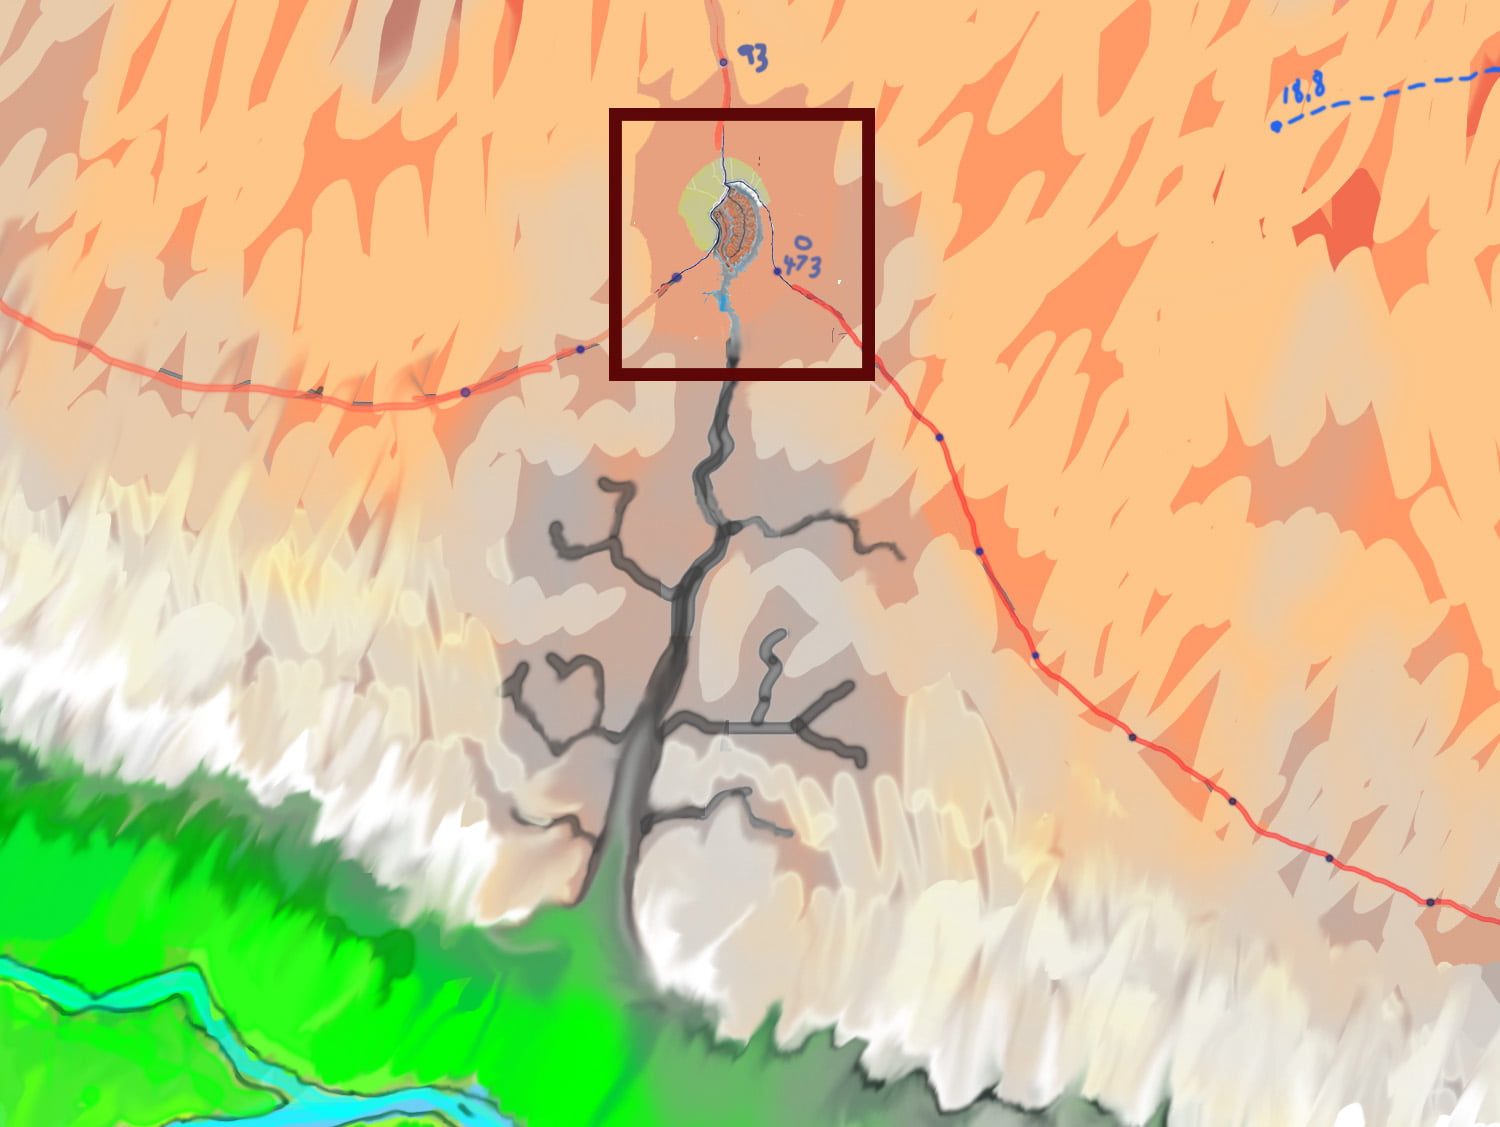
The map above shows the southern margin of the Guarded Land with Qunoth on the right edge of the map, and Makar in its upper left corner. The raised road (a section of the Ringwall) connecting Qunoth to Makar is shown as a solid red line with regular dots along it showing its watchtowers. The dotted red line show’s Carnelian’s route, and has each camp he makes marked and with an associated date
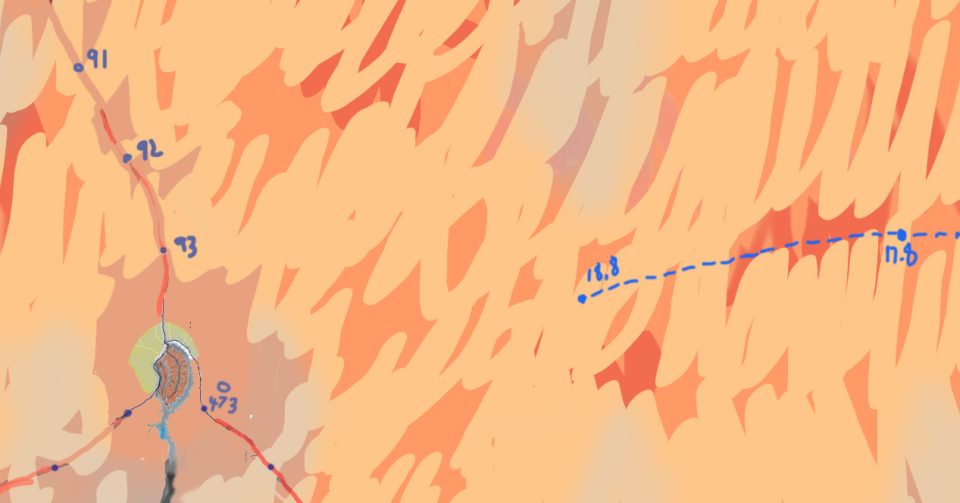
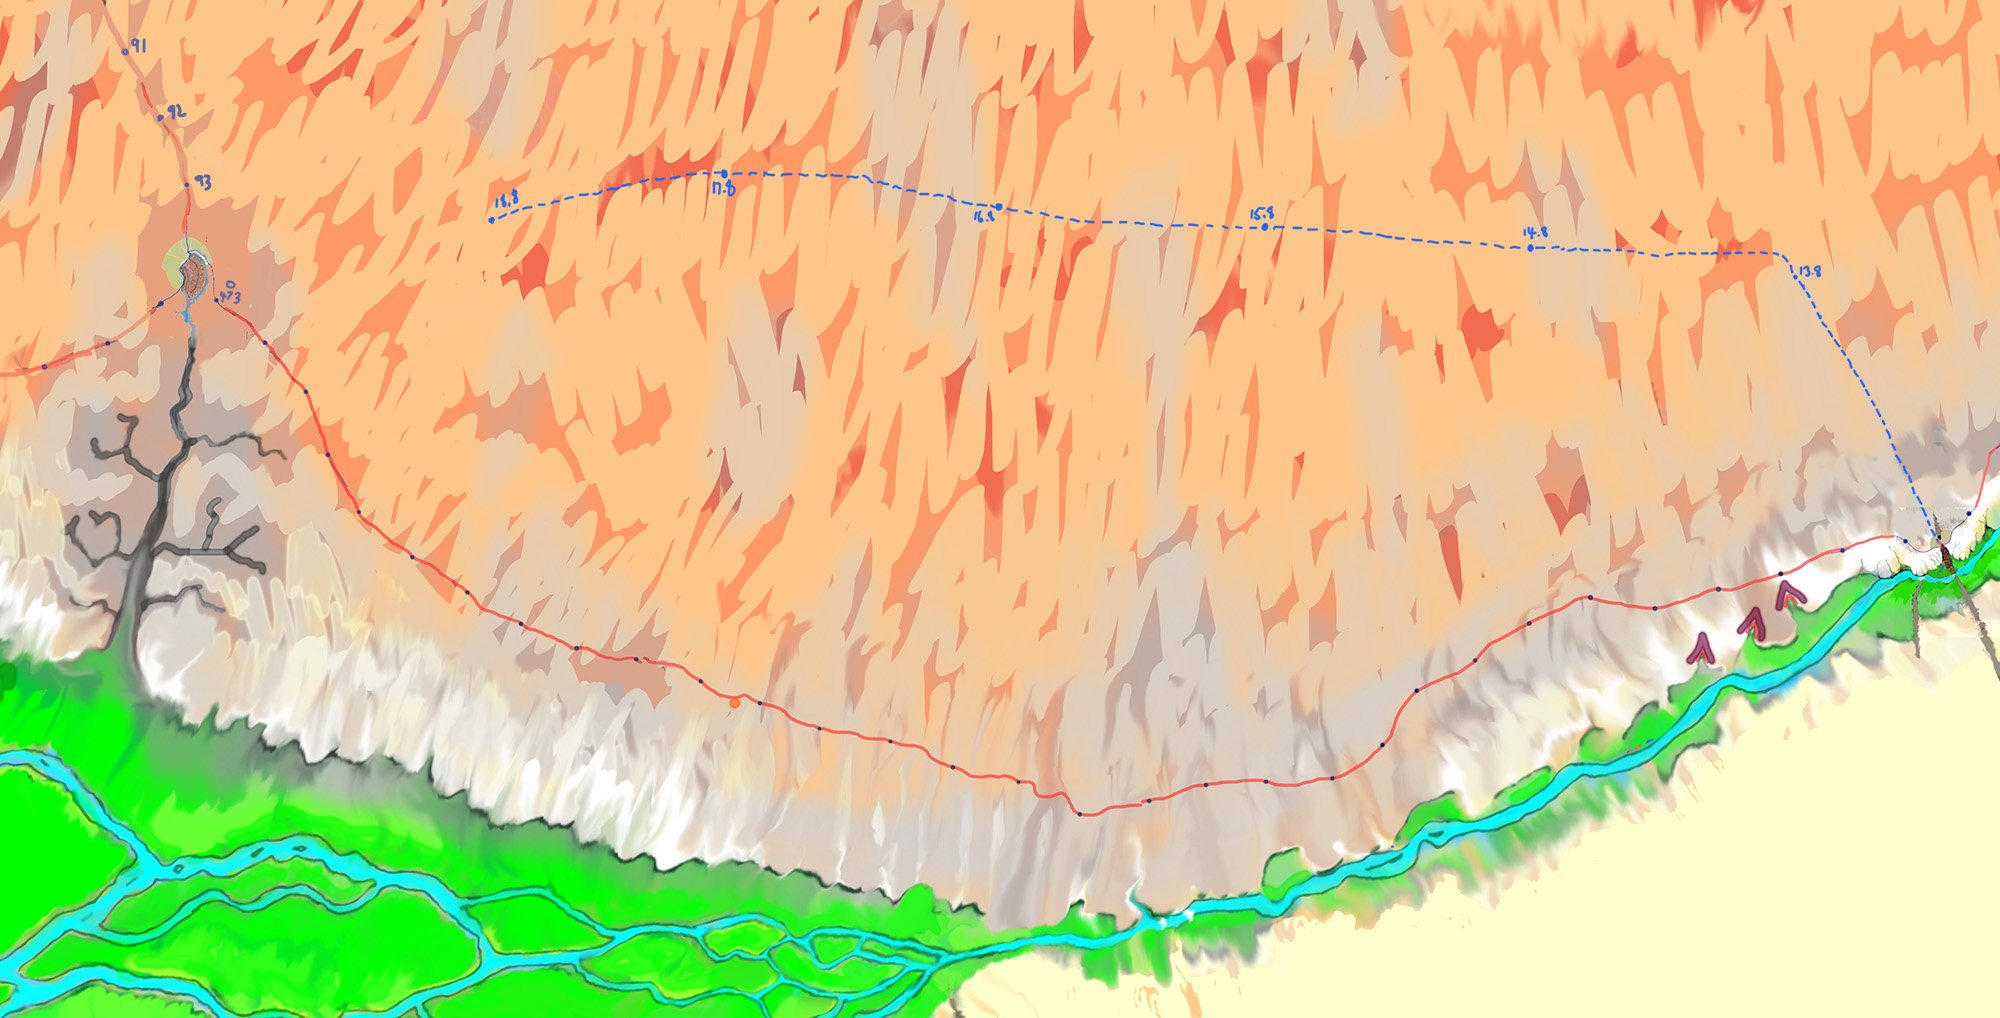
The second map enlarges the area around Makar, showing the city at the convergence of three roads and the Pass. Watchtower Ring 473 is shown as well as the three watch-towers on the Great South Road, Sun 91 – 93. These are the towers variously that are mentioned in the story. Carnelian can be seen approaching from the east—his last position marked being where he is on the 18th day of the 8th month
watchtower
the city of Makar
The map above shows the location of Makar, near the southern edge of the Guarded Land, and at the head of a canyon system that runs down to the Leper Valleys. It is the terminus of the Great South Road from Osrakum
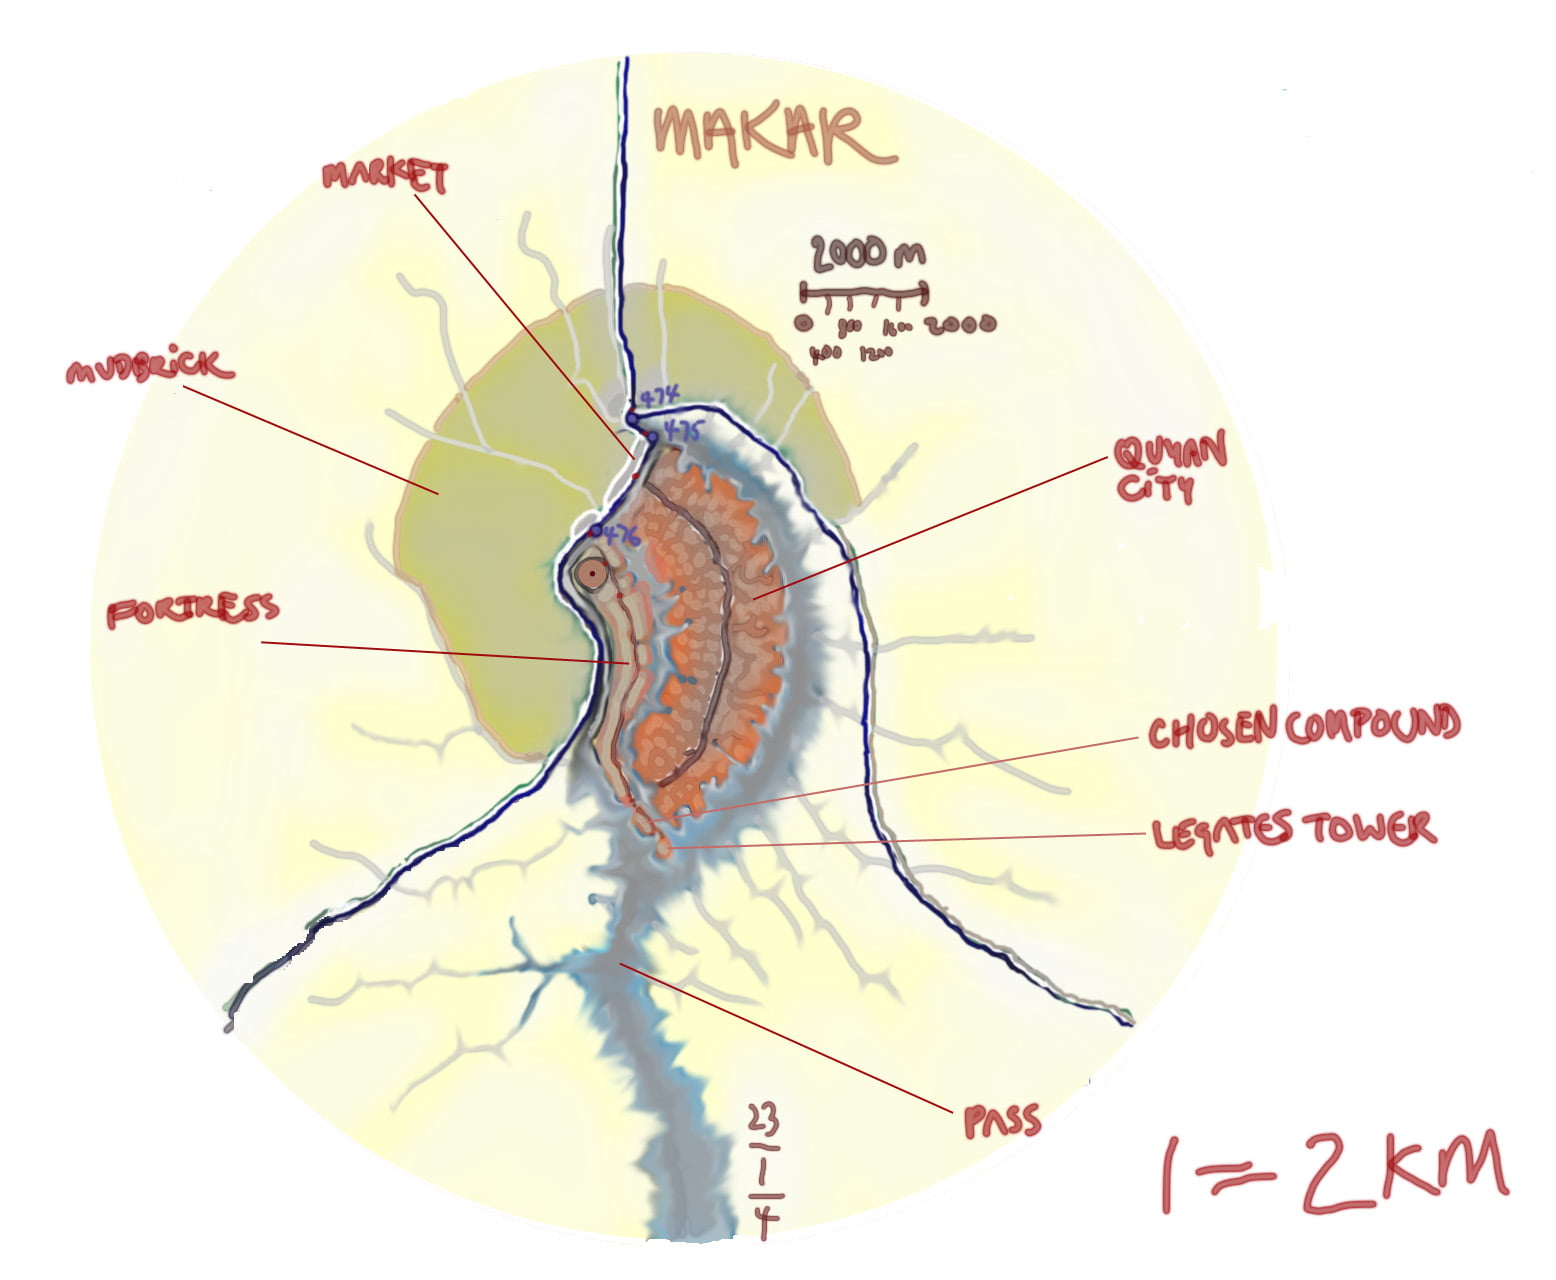
The second map shows Makar in some detail. The city proper is the curving red element that is shaped a little like the body of a peeled prawn. This part is ancient and is a sort of peninsular surrounded by canyons that are the beginning of the system of canyons running down to the Leper Valleys. Alongside the Old City, running down its western side, is a much narrower peninsular upon which is built the legionary fortress of Makar. Makar’s ‘red eye’ is its cothon
The large yellow-green swelling to the north of the city is an area dense with hovels, within a boundary ditch. The indigo lines show the raised roads of the Ringwall and the Great South Road. Three watch-towers—shown as violet spots—lie on or near the junction of these roads. The most northern stands at the junction. The other, nearby, stands guard over a gate that gives access to the Pass and, thus, controls the route down to the Leper Valleys. The third guard the gate of the legionary fortress. When Carnelian enters the city from the north, he passes each of these towers in turn
Note the road that runs through the fortress from its entrance by the watchtower all the way to the ‘island’ at its southern tip—that is reached by means of another ‘island’ (the sanctum) and two bridges. This last tear drop, looking down the Pass, is the tower of the Legate of Makar
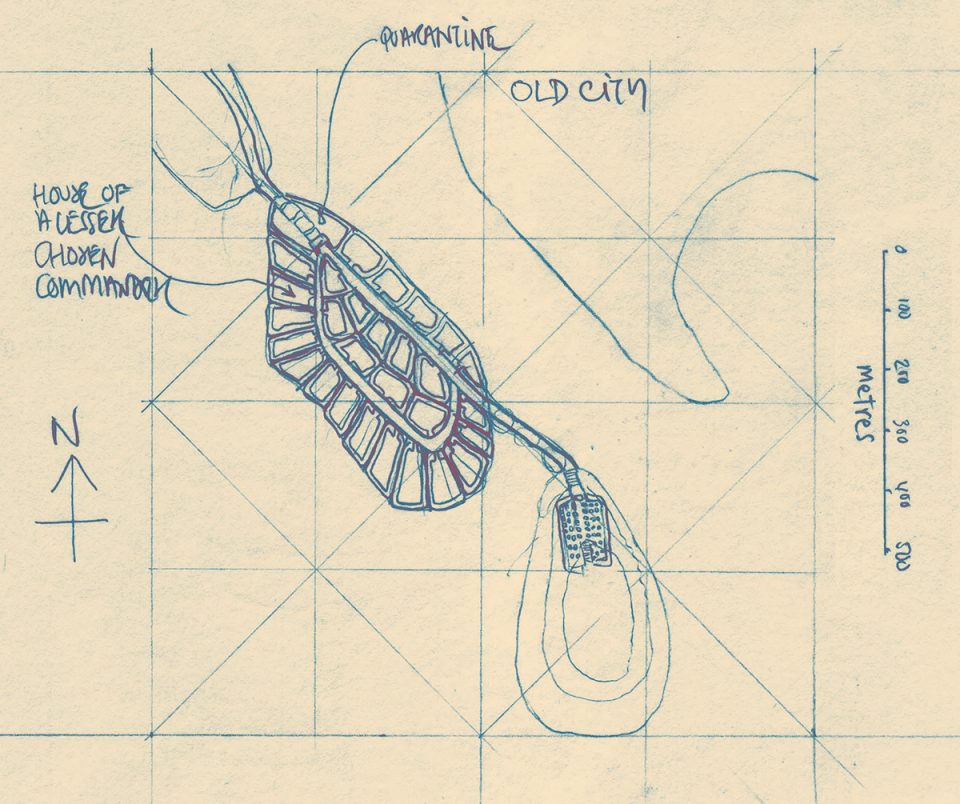
The third diagram is a sketch showing the most southern part of the legionary fortress. The first ‘island’ is the sanctum and is divided into domains for the use of the Masters who command the dragons of the legion and for their households. The most southern ‘island’ of all is where are located the halls of the Legate of Makar.
the cothon
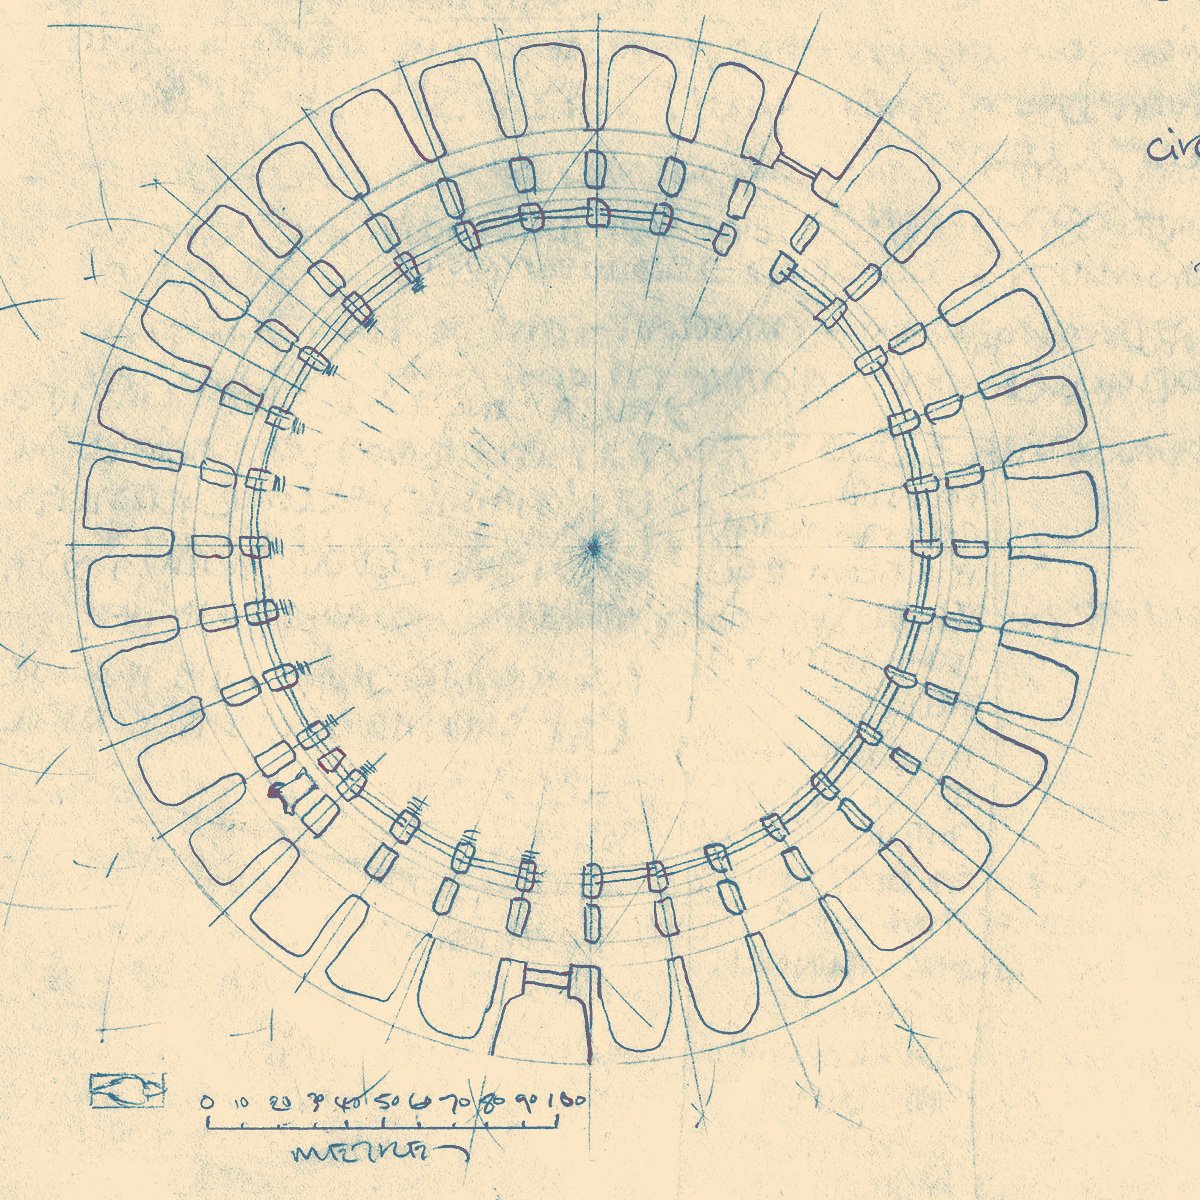
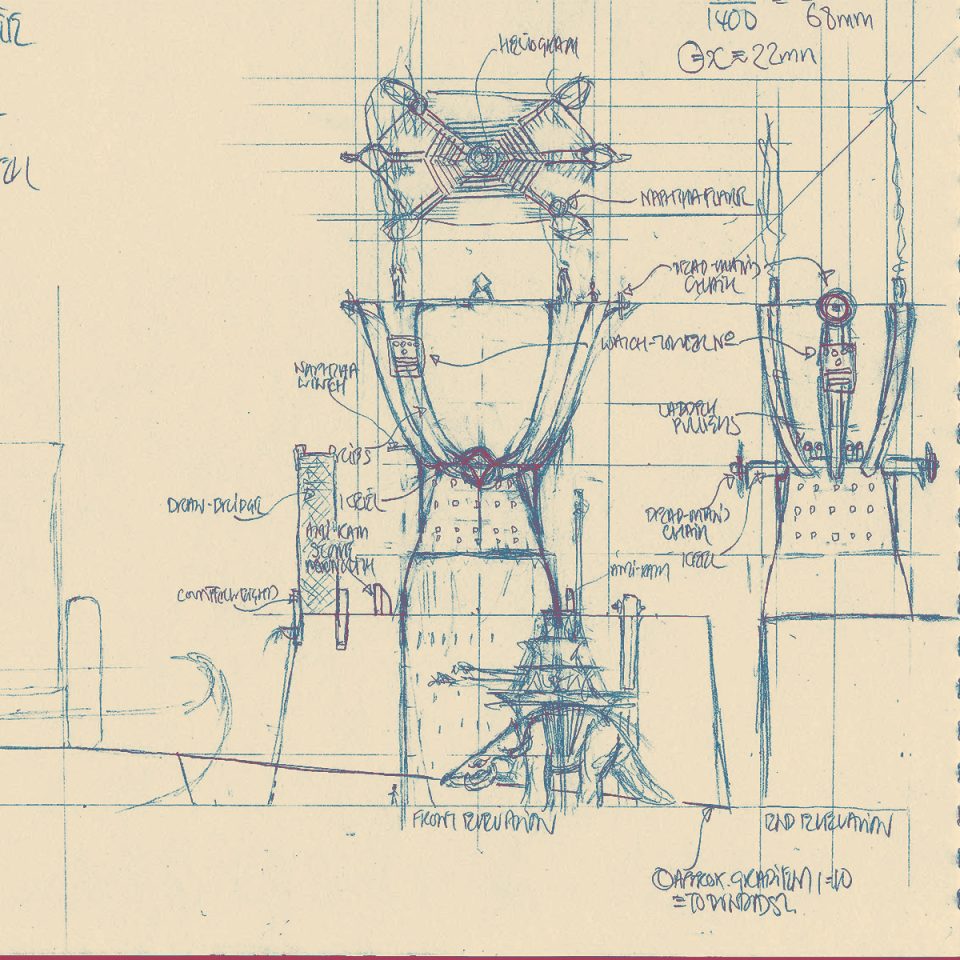
The first diagram shows a plan of a typical cothon. Around its edge are the deep vaults in which the dragon ruhuimur are stabled. Within this are two further rings, of piers. The innermost one is where the dragon towers proper are stored. The ring between this and that of the vaults is where the tower bases are stored. The two major components of each tower are suspended upon beams and rigging above the gaps in between the piers, to allow a dragon—moving from its vault towards the centre of the cothon—to pass beneath each tower component. As the dragon does so, the tower components are lowered on to it and, as the monster’s strength returns after its period of sleep, its tower is assembled on its back
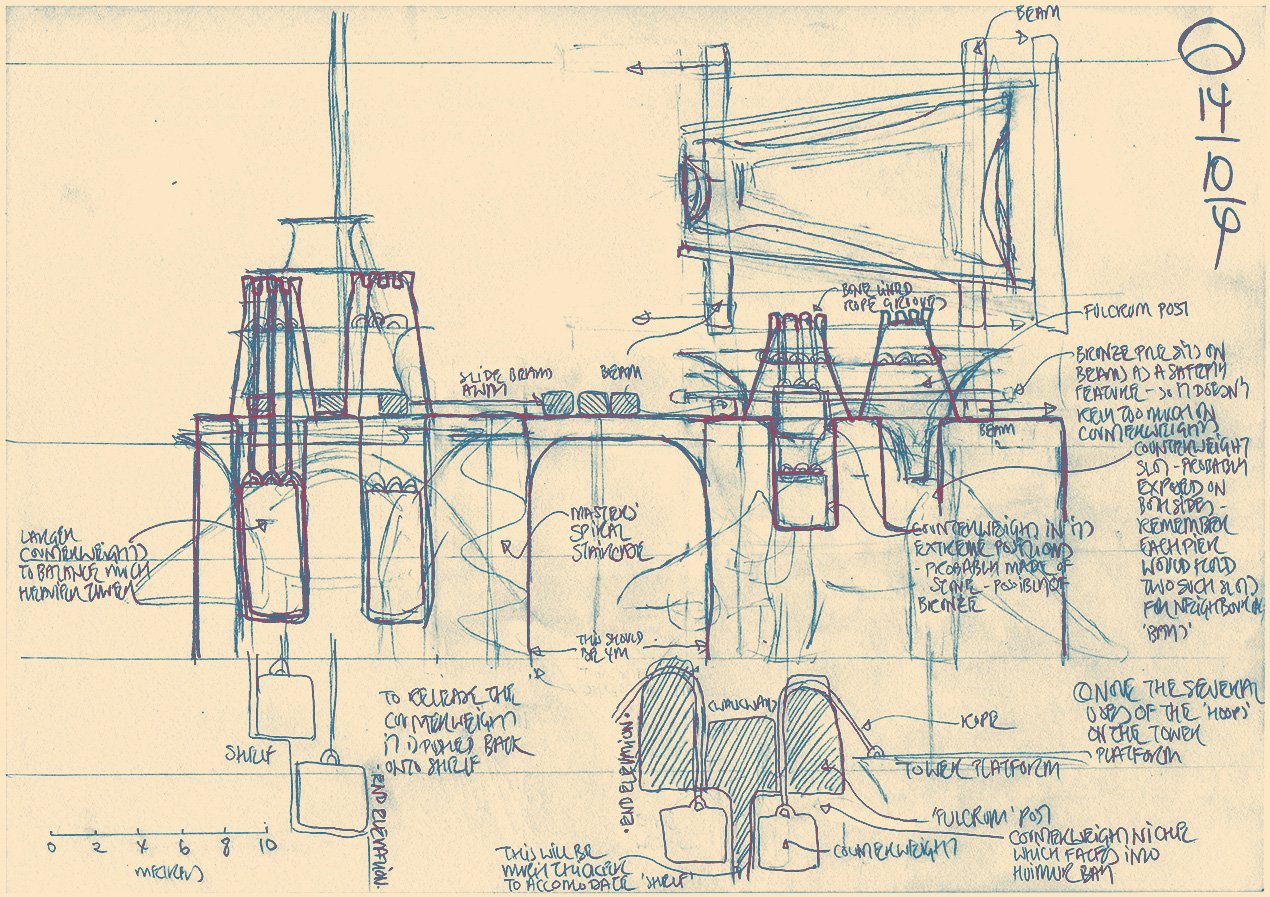
The diagram above is of a pair of piers as viewed from the side (with the centre of the cothon to the left, vaults to the right). The rough outline of a dragon can be seen standing beside the right pier; it is waiting for the tower base shown above (and in plan in the expanded version of the diagram) to be lowered first onto its back. Later it will move towards the left, beside the second pier, where the truncated pyramid of its tower proper will be lowered and joined to the tower base
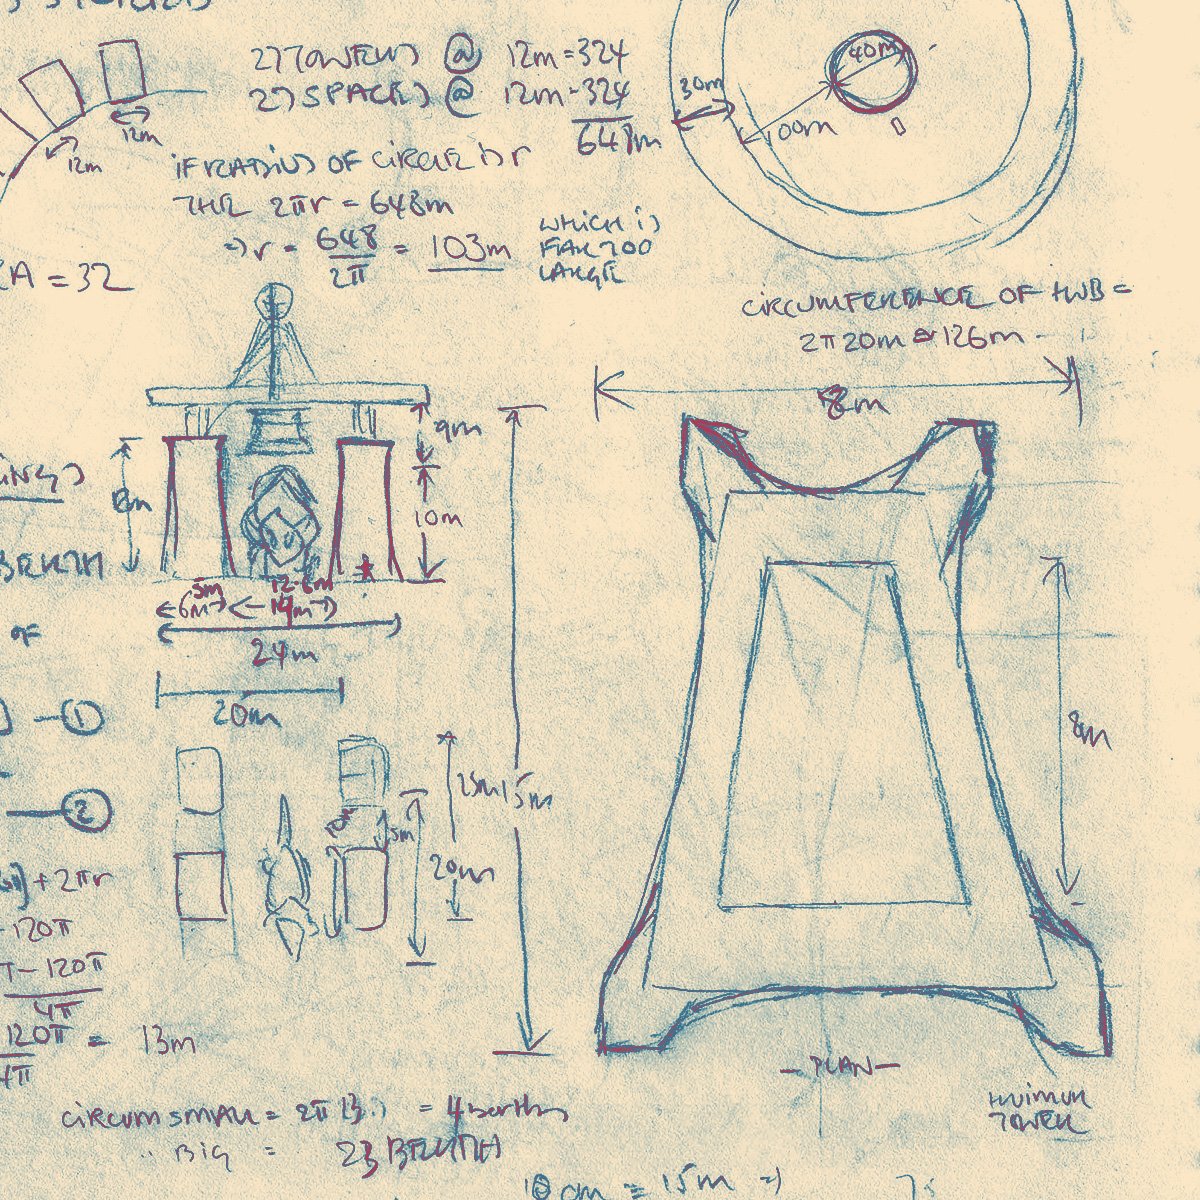
The final diagram shows my initial exploration of the cothon mechanisms. The shape on the right is a tower base seen from above, tapering towards its front. The top left shows a pair of piers with a dragon between them facing us, a tower ‘pyramid’ suspended above it. The bottom left shows the same dragon from above between the two inner piers
Aurum’s clock
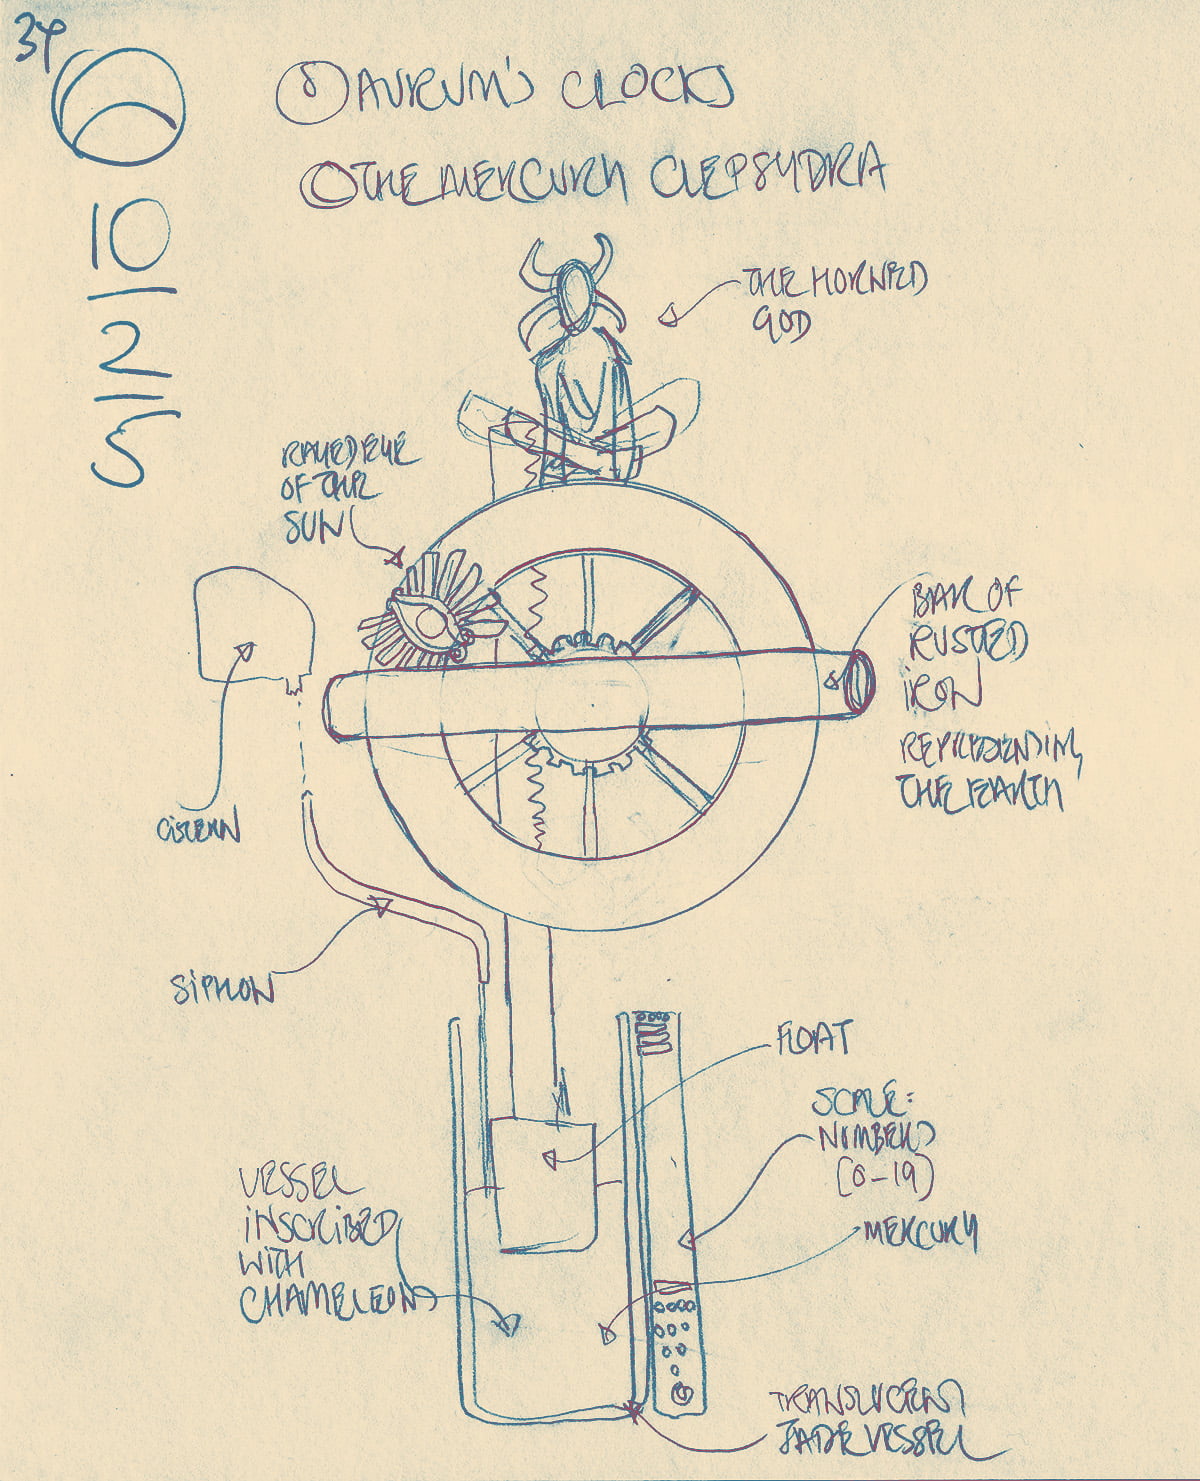
I drew this diagram of Aurum’s clock so that I could understand how it worked. His clocks have various kinds of significance, some of which I am not entirely sure of myself
The particular one depicted here is a clypsedra, or water clock, though in this case the fluid that powers it is not water, but mercury
the cocoon
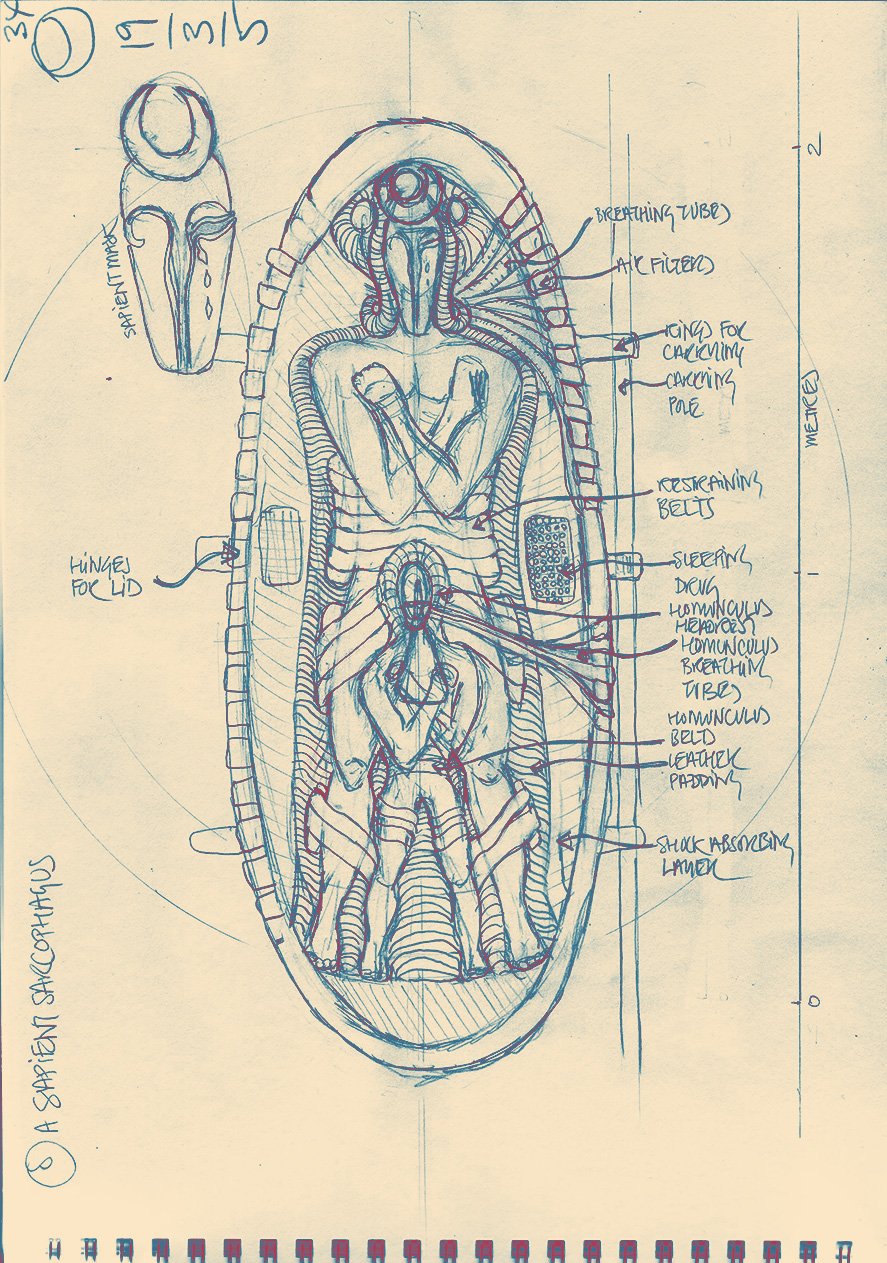
A sapient capsule is shown set vertically and open. Within it a Sapient ‘stands’ with his homunculus between his legs. Both are ‘stowed’ for transit—held in place by many leather straps. Note the hollow they are in is padded to absorb shocks as the capsule is moved from one place to another. The Sapient is wearing a standard sapient mask to which breathing tubes are connected (coming into the capsule from the right). Note the rectangular repositories for the elixir ‘pearls’
