Chapter: Leper’s Ladder

Information relevant to the 9th chapter of Dragon Fire
the southern Guarded Land
Leper’s Gorge
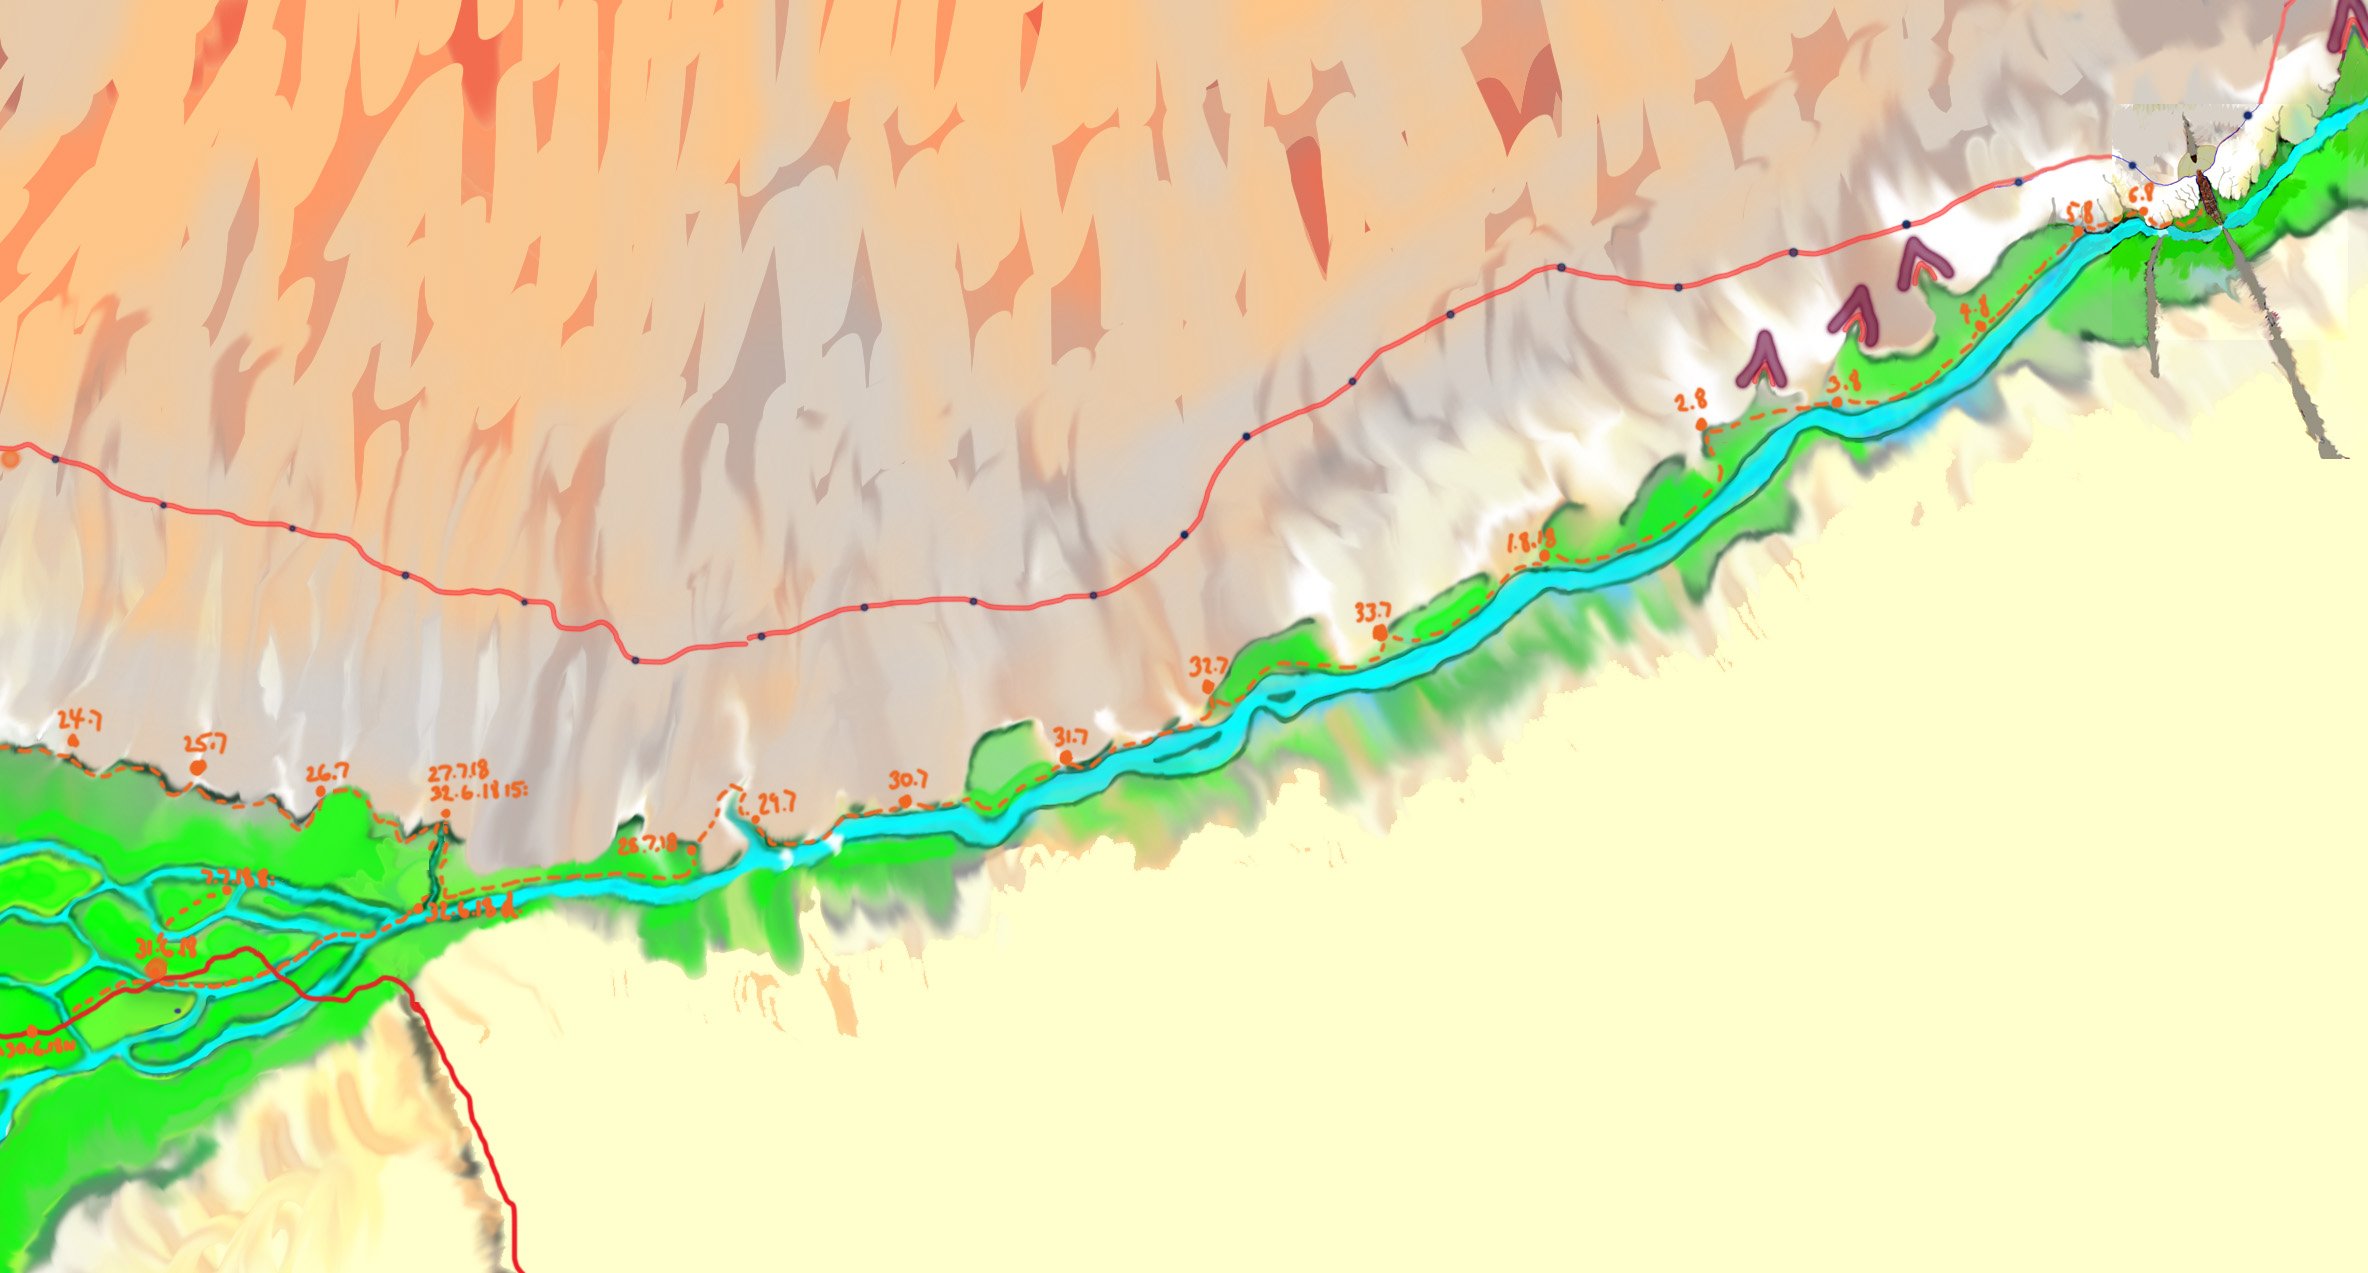
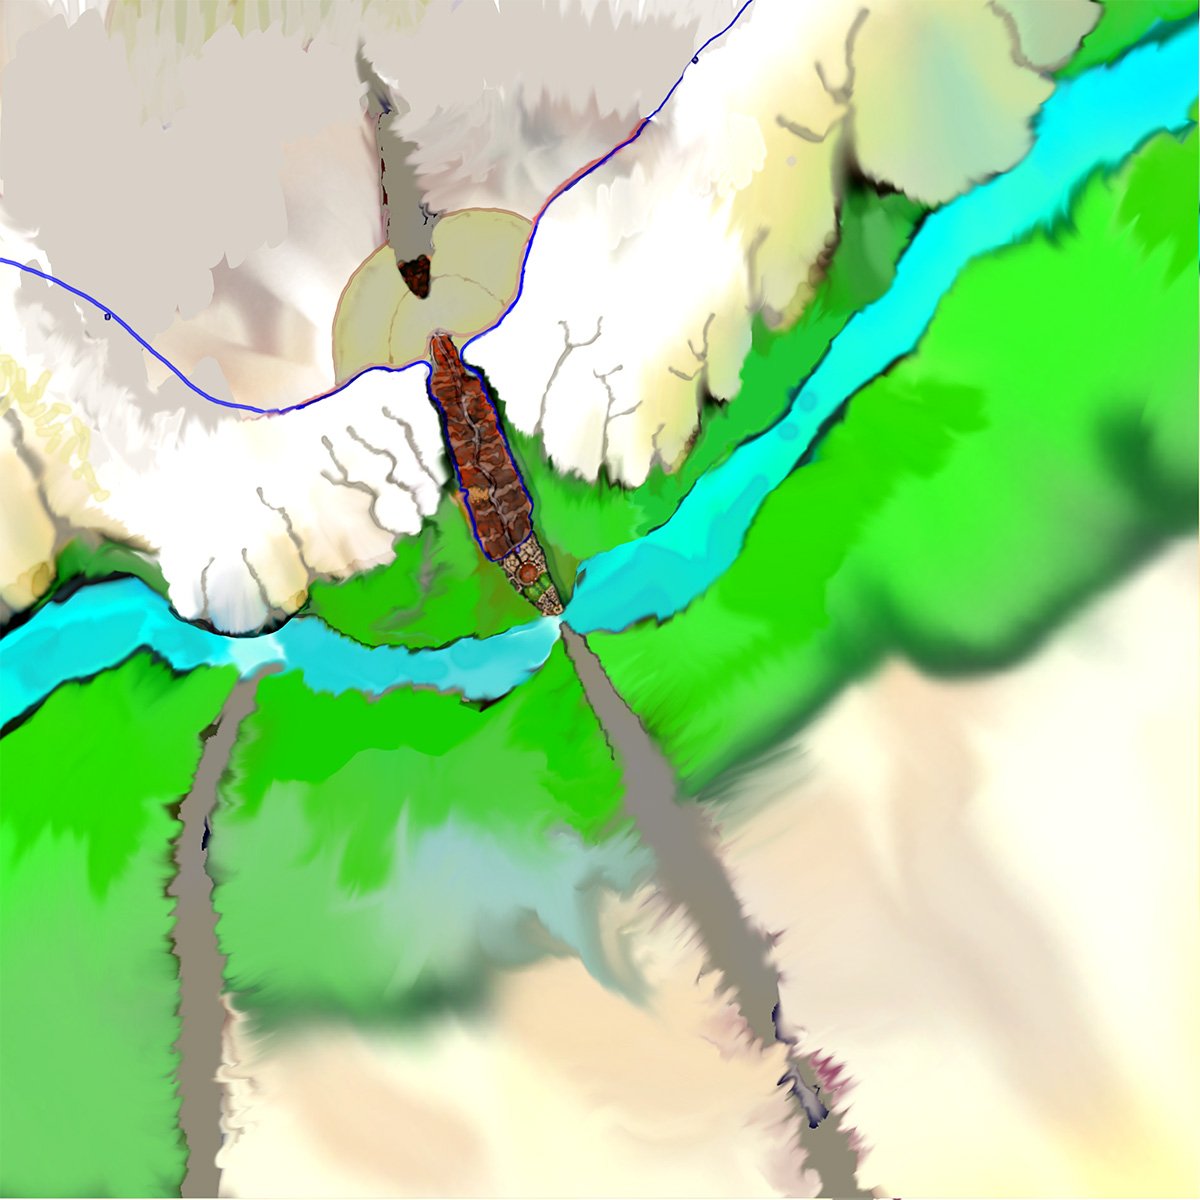
This map shows Carnelian’s journey up the Leper’s Gorge, from Lily’s cave (in the bottom left, up the tributary stream that joins the river just before the fork) all the way up to Qunoth (at the top right, at the end of the diagonal grey line—that is another basalt dyke like the Backbone). Note the many ‘valleys’ along the southern margin of the Guarded Land plateau—many of which hold Leper refuges. The purple chevrons are smaller ‘passes’ – negotiable ascents to the Guarded Land. The Ringwall is shown as an orange line snaking across the Guarded Land – the ‘dots’ along it show the position of watch-towers. Carnelian’s route is shown as a dotted orange line along with the dates and locations where he stops for the night.
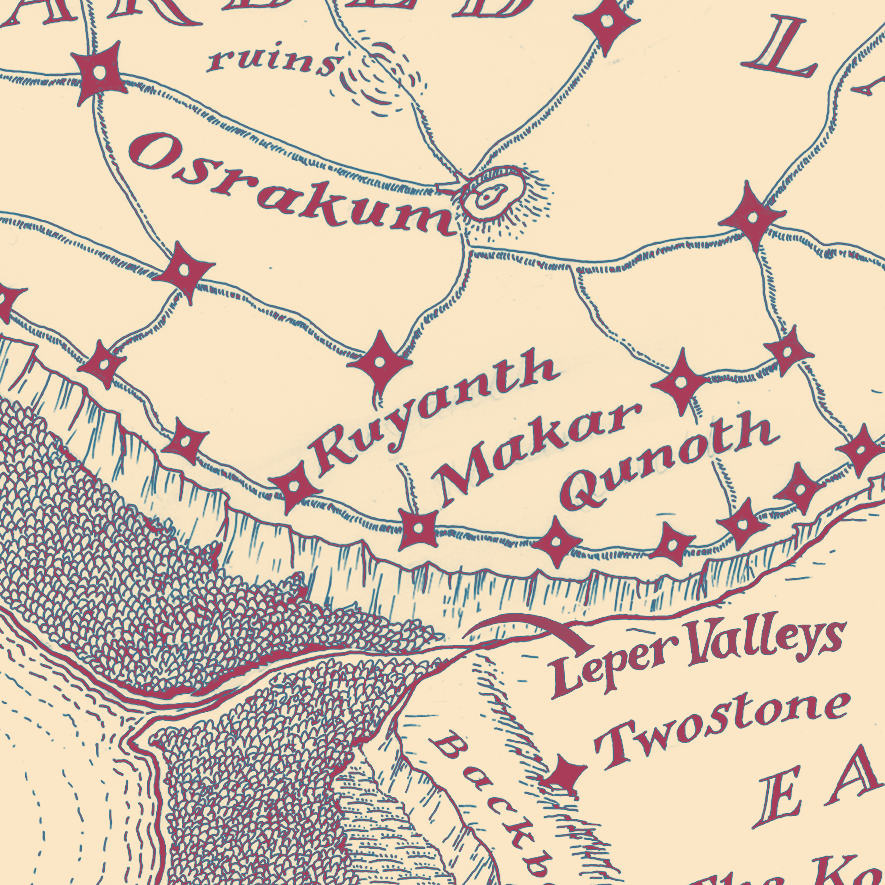
the city of Qunoth
Qunoth – coming originally from Quyan keyu meaning ‘seven’ and noth meaning ‘ladder’ – refers to its position controlling the seven passes marked on the map above as purple chevrons. (The square frame marks the area depicted in the expanded version of the 2nd image)
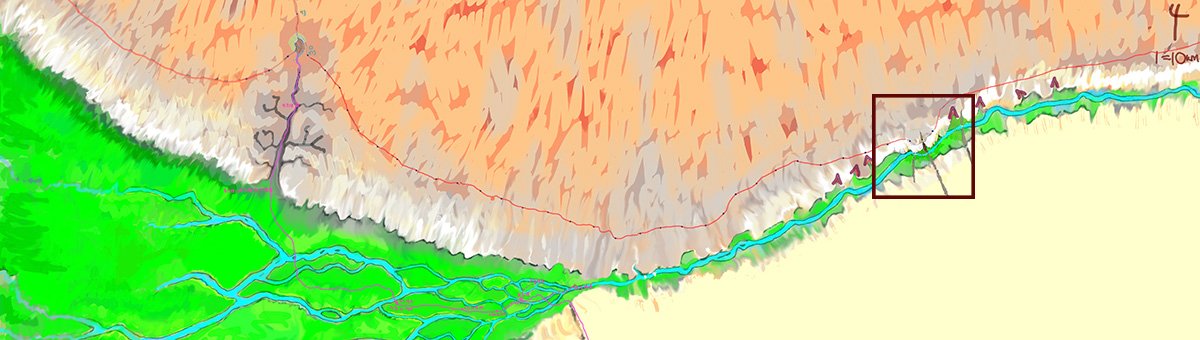
The second map shows Qunoth (the long red structure)—looking a little like a cuttlefish – extending as a blade of rock from the Guarded Land plateau – its fissured limestone being shown in white. The Qunoth rock is part of a vast basalt dyke (that can be seen better on the expanded image) that the Gorge river breaks through far below —the floor of the Gorge is shown in green. The Ringwall road is the pale brown thread passing across the northern edge of the city. Its leftway—shown in blue—separates from it, does a circuit of the city, and returns to join the road. Top left, on the other side of the raised road, are the shanties spreading off into the interior
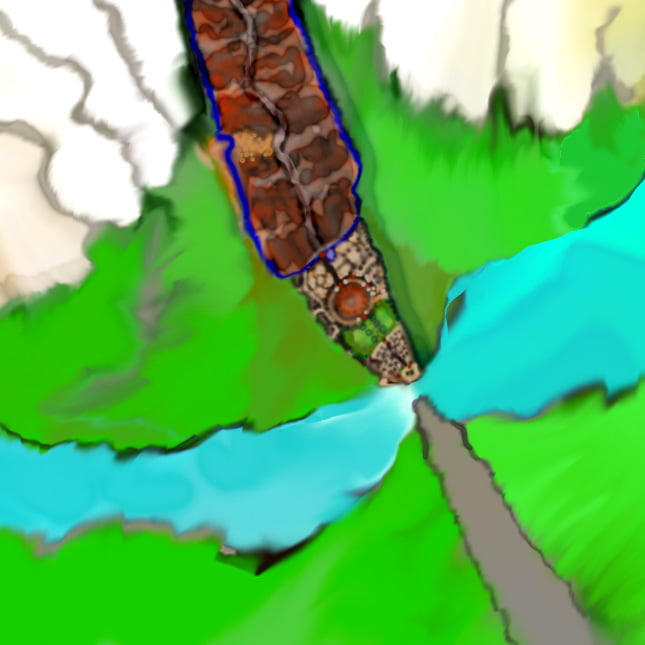
The third diagram shows the part of Qunoth that extends out high above the land below. The orange region (towards the top left) is the Midden. The dark red areas are the tenements of the city, the pale threads are roads. Fort Street runs down the spine of the city towards the gate—shown as a red dot—of Qunoth’s legionary fortress. Southwards, beyond this, are the paler legionary barracks and stables. The ‘red eye of the cuttlefish’ is the cothon. The green region beyond is parkland and the pale triangle on the other side is the sanctum. The pale tip is the tower of the Legate of Qunoth that stands above the white threshing falls far below
watchtowers
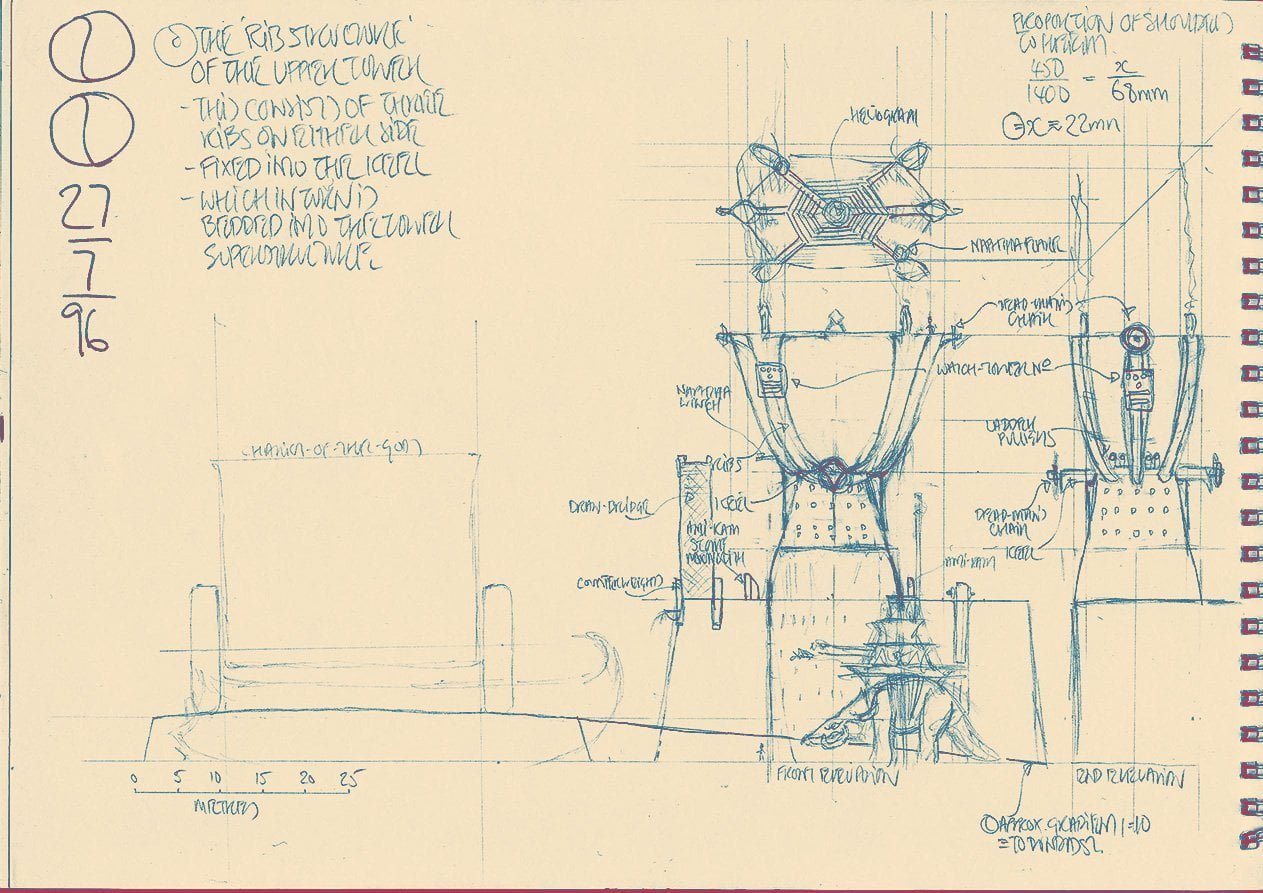
The diagram above shows side views and a view from above of a standard watchtower. Each such tower stands guard on a gate controlling passage from one province into another through the wall that carries a leftway. Note the drawbridge that carries the leftway over the gateway below
Watchtowers are set at regular intervals along the raised roads of the Guarded Land. These towers and the high road—the leftway—that runs under their gaze, form not only the primary communications systems of the Commonwealth, but also provide the Wise with a ‘sensory grid’ with which they ‘see’ much of what goes on in the Guarded Land. In addition, each tower is garrisoned with enough auxiliaries to defend the gate over which each tower stands guard
The communication system has two distinct aspects. Messages can be carried as sealed despatches at furious speed along the leftway by couriers who obtain fresh aquar at each tower. Couriers, and what they carry, are protected by stringent codicils of the Law-that-must-be-obeyed.
Shorter and more critical messages are jumped from tower to tower by means of the heliographs during the day or, more slowly, by naphtha flares at night
A watchtower is often at the centre of an extensive stopping place, where the throngs travelling on the road below can make camp for the night
Watchtowers play an important part in the Stone Dance, and it was because of this that I felt the need to understand their exteriors and interiors so well
From the summit of a watchtower, six ribs curve up to hold aloft a platform at the centre of which is located a heliograph device. Naphtha, piped up the ribs, burns in flares to transmit signals at night when the heliograph cannot operate. The ribs branch up from either side of a keel beam. At the ends of the keel beam are two of the tower’s four deadman chairs: the other two hang from the upper ends of the middle ribs. Lookouts sitting in these chairs maintain an unsleeping scrutiny of the Guarded Land and the road below. The keel beam is embedded in the superstructure of the tower that consists of a number of floors: those above the level of the leftway are connected by ladders that can be raised by means of counterweights. Those below the level of the leftway are connected by ramps
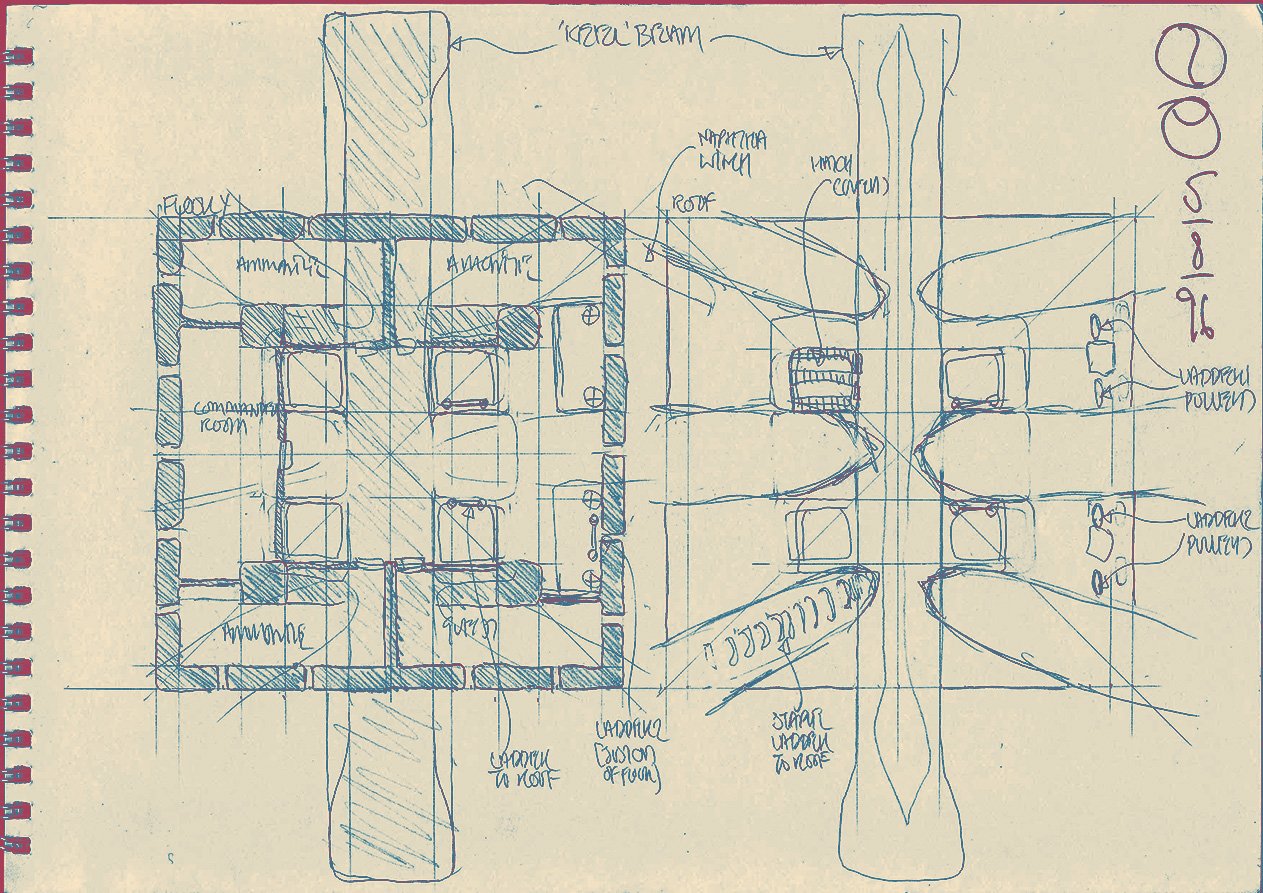
Note the trapdoor in the roof that gives access down into the uppermost storey. Note also the staples climbing up the rib in the lower left (of the right hand plan) that gives access to a naphtha flare and to the heliograph platform. The left hand diagram shows the upper storey that provides accommodation for the staff of ammonites who operate the heliograph. It is these chambers that Carnelian, his father and the other Masters occupy each night on their journey to Osrakum
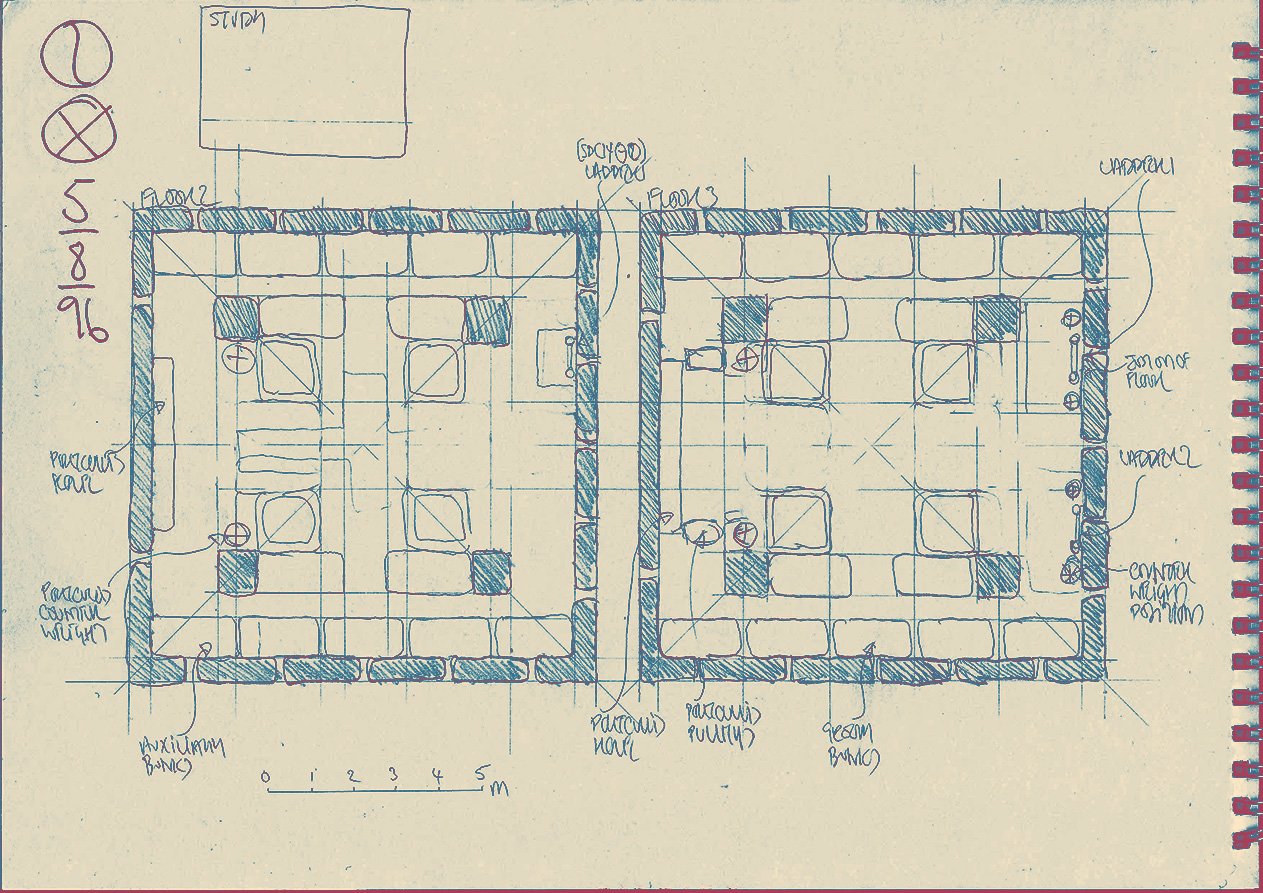
This second page of floor plans shows the two storeys that are the barracks of the tower garrison
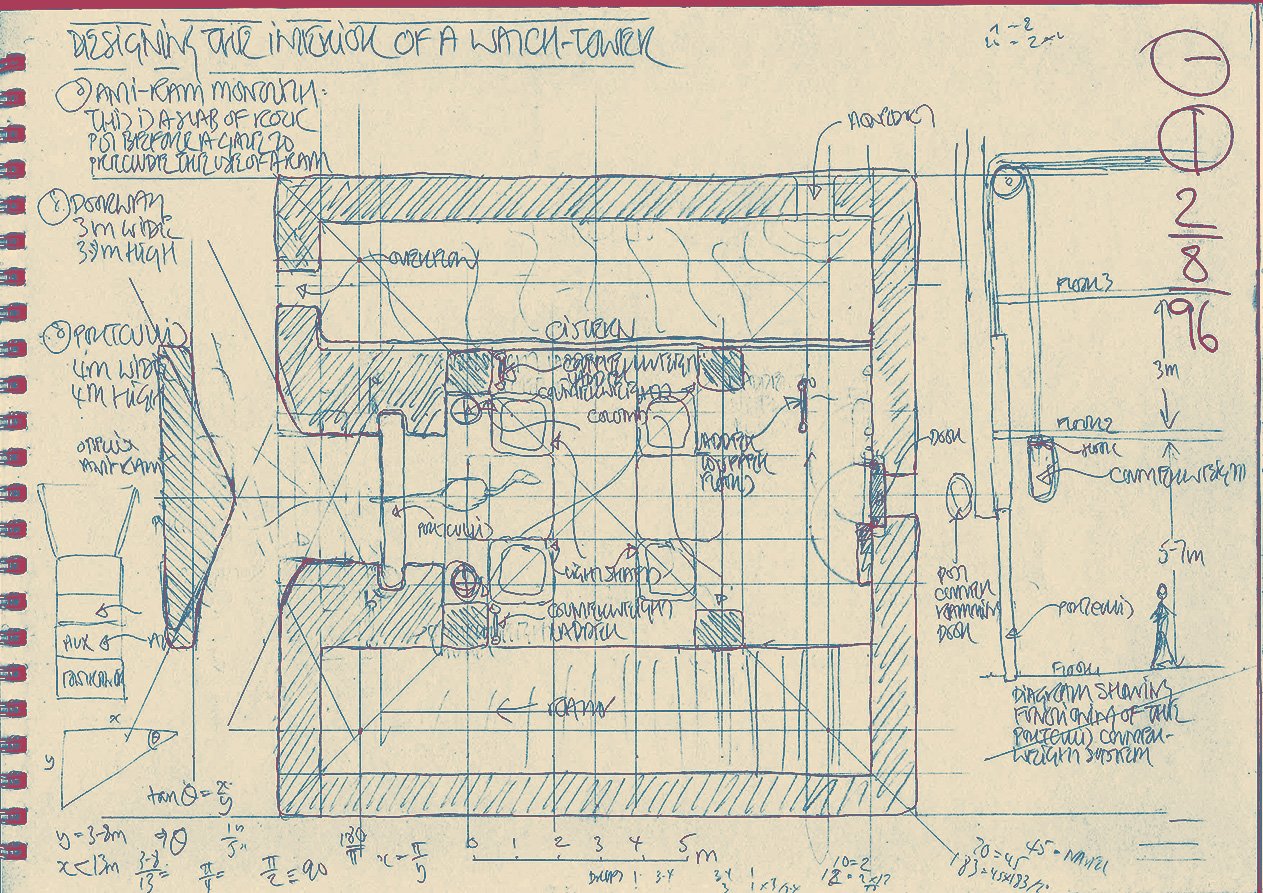
The third page of floor plans shows the storey of the tower that is level with the leftway. In the upper part of the diagram is a cistern. Corresponding to this—in the lower part of the diagram—is the ramp that leads down into the stables. A portcullis seals the entry from the leftway. Standing before this entrance is a monolith, the purpose of which is to make it impossible to use a battering ram against the portcullis. To the right of the portcullis you might be able to make out the faint sketch of an aquar as seen from above. I put this in so as to be able to more easily imagine what it would be like leading an aquar into this space. A small diagram on the right hand side of this page is a side view showing how the portcullis and its counterweights work. It also includes measurements for the heights of some of the storeys.

The fourth and final page of floor plans shows two of the three stable levels that are linked by ramps to the upper entrance—from the leftway. Various other mechanisms are lodged here that have to do with the operation of the portcullis, etc in the levels above. The lowest level of all is the uppermost diagram. Note that it too has a portcullis and a monolith set facing it. This gives direct access to the main carriageway of the raised road that runs along the foot of the wall carrying the leftway