Chapter: Overrun
Information relevant to the 8th chapter of The Third God
the Halls of Rebirth
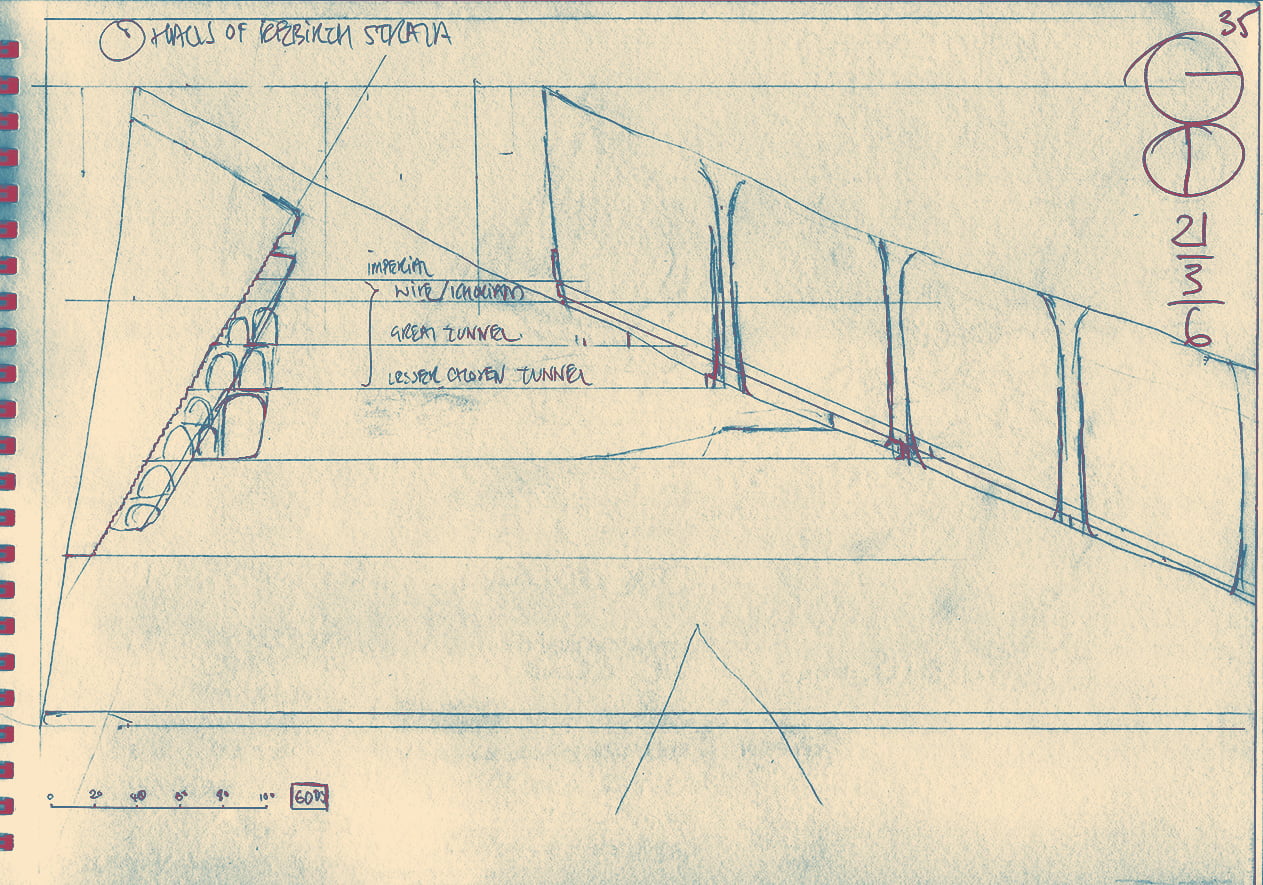
The first diagram shows a cross-section (north-east—south-west) with the Plain of Thrones on the left and the Halls of Rebirth and the colonnade of the Labyrinth off to the right. Note the slope that the sarcophagus columns of the Labyrinth climb—this is the outer slope of the volcanic cone of the Plain of Thrones. The triangular concavity in the crater wall—facing out over the Plain—is the Umbilicus and behind it, cut into the rock, are the strata of the Halls of Rebirth
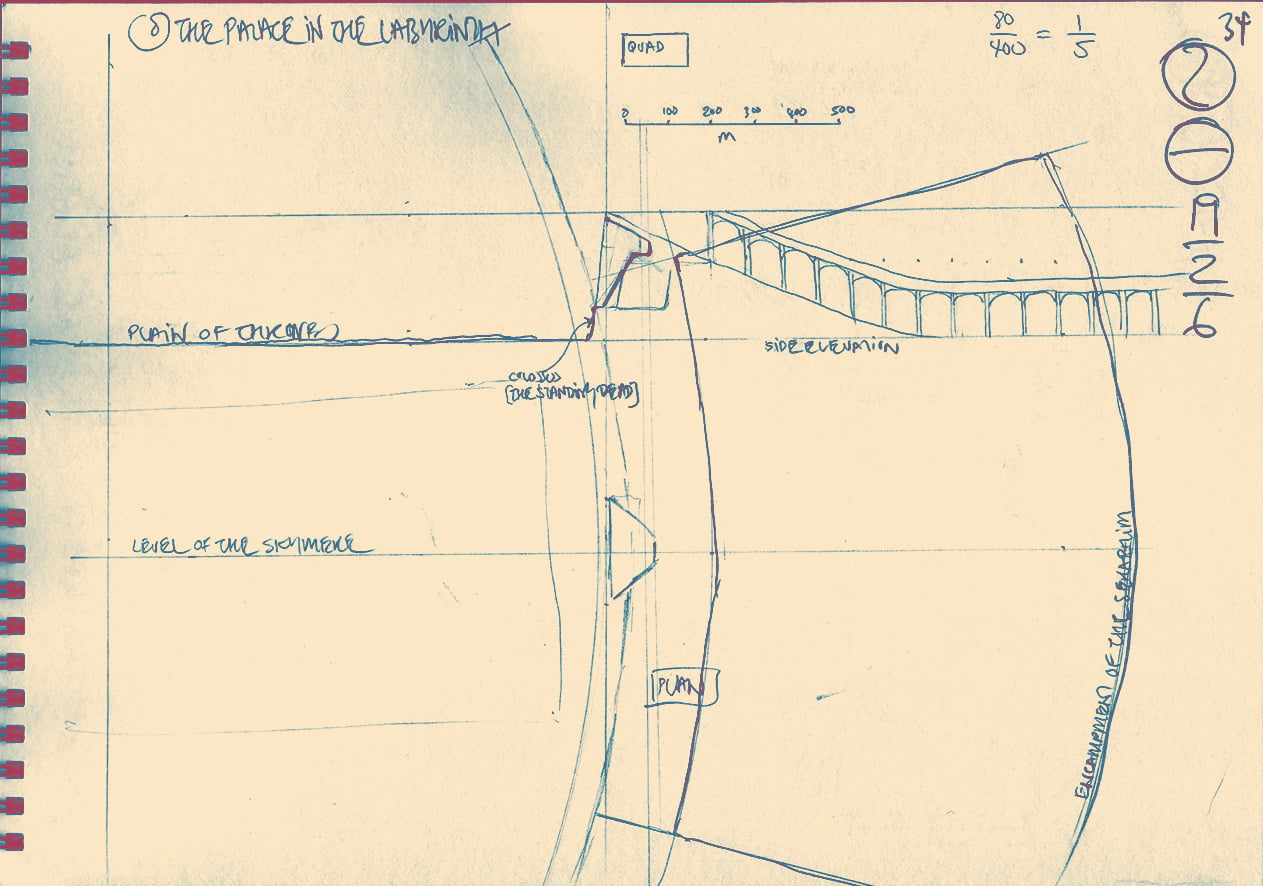
The second diagram shows a close up of the Umbilicus with the arched voids that lie behind it
The Halls of Rebirth are the equivalent on earth of the Halls of Thunder in the sky—the residence of the God Emperor and his court in the Labyrinth
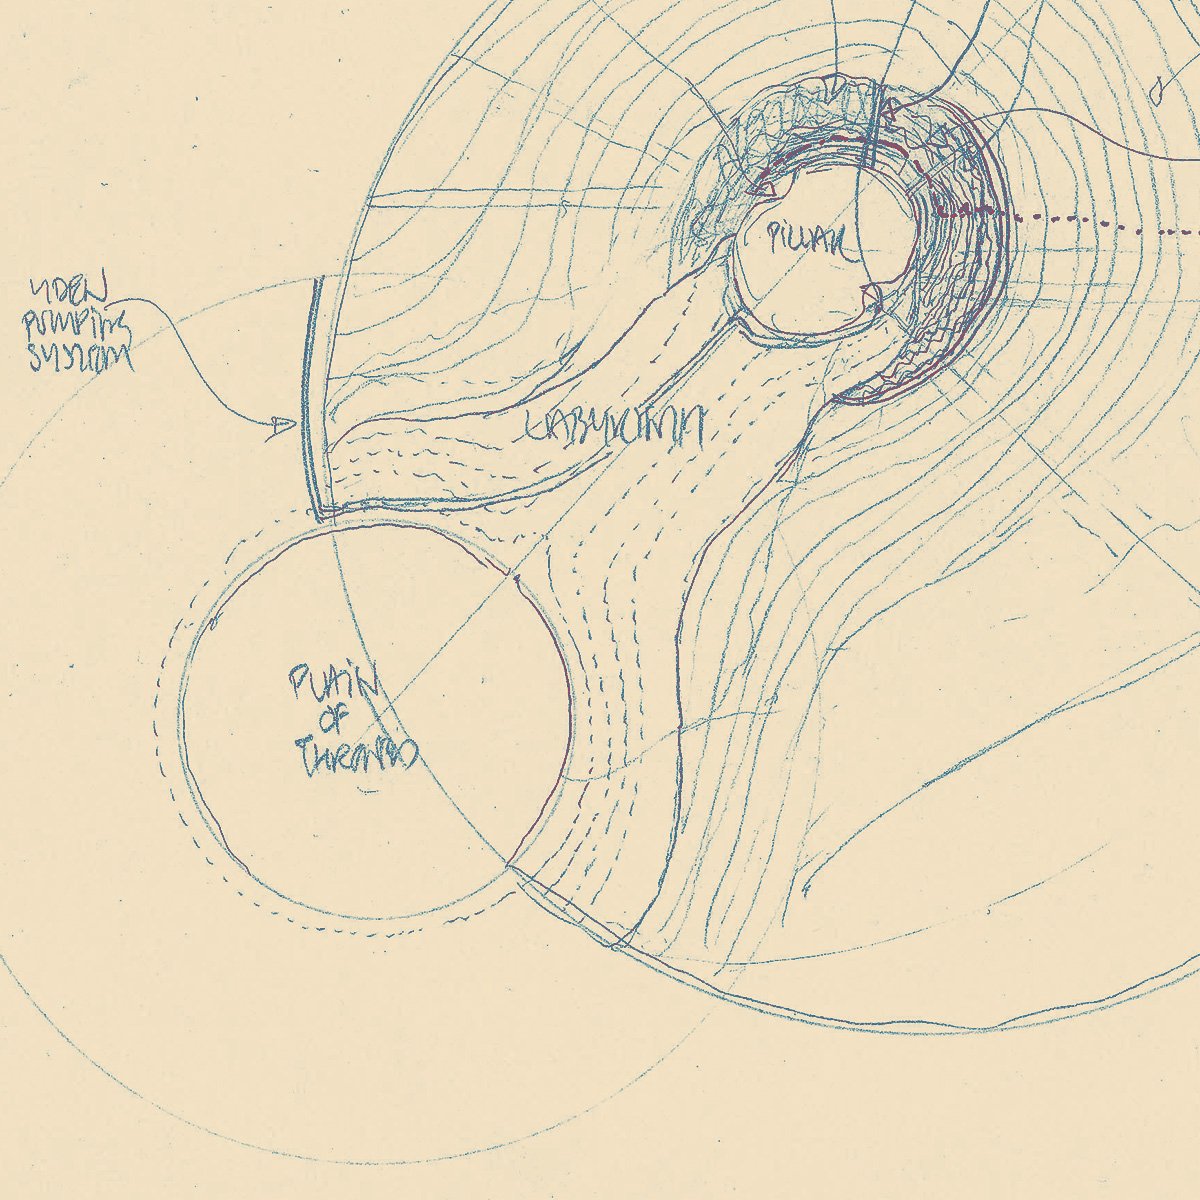
the Labyrinth
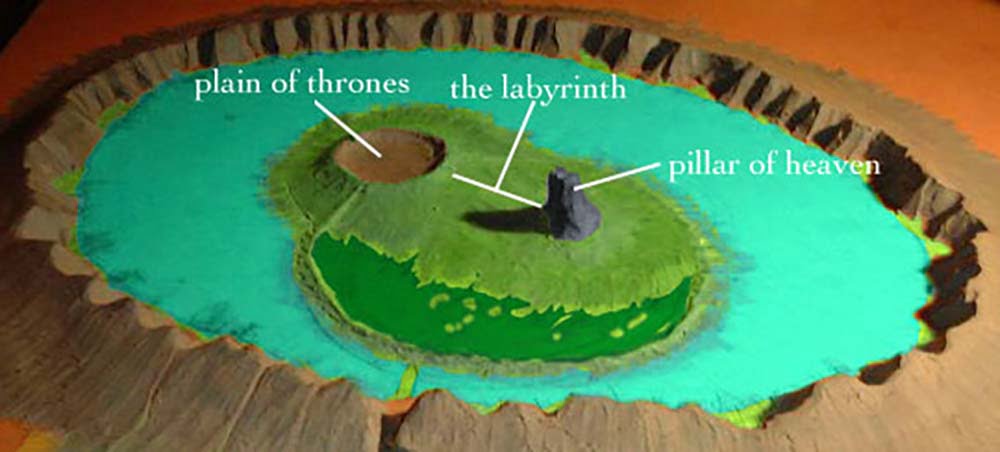
Lying within the Yden, the Labyrinth covers the ridge connecting the Plain of Thrones to the Pillar of Heaven. It consists of an immense, hypostyle hall in which each column is a mausoleum for a past God Emperor, Empress or other important personage from the House of the Masks; there are over one thousand of these column mausolea. Originally they were free standing; it was only later that they were spanned by arches, and the whole structure roofed over. The Halls of Rebirth are partially built into the south-western wall of the Plain of Thrones but they also spill into the Labyrinth
The two depressions that ‘nip’ the cross-section of the Pillar of Heaven contain the only ways by which it can be climbed. The north-western depression contains the Rainbow Stair
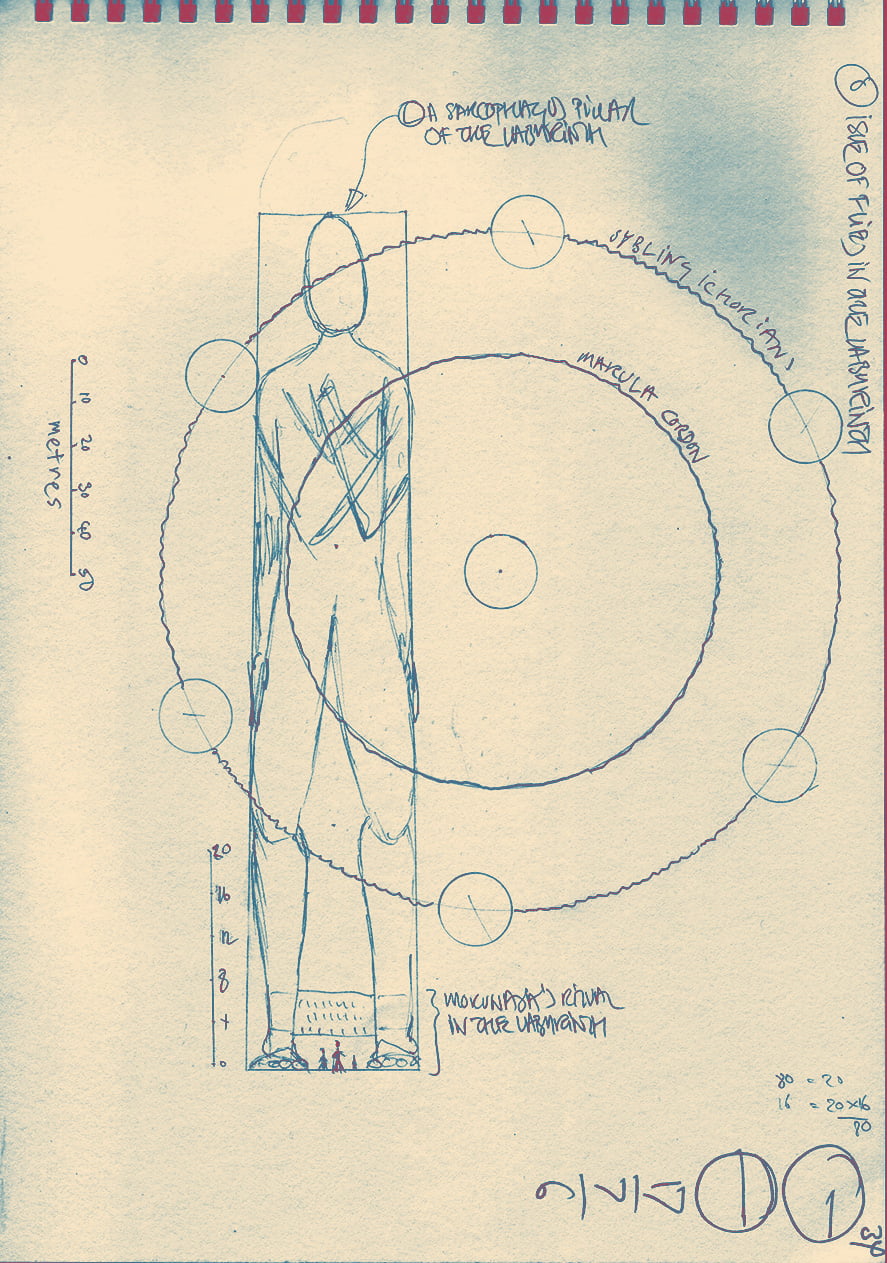
Morunasa’s camp in the Labyrinth
The circular diagram is a plan of Morunasa’s camp in the Labyrinth, with sybling Ichorians forming an outer cordon between six sarcophagus columns, and Marula making an inner cordon around a central sarcophagus column. A picture is shown of that central column—a towering figure, containing at its core the embalmed mummy of a God Emperor. Figures are shown at its feet for scale. Also shown is the netting stretched between the ankles of the colossus upon which Morunasa has hung his victims
approaching the Blood Gate
This shows the view that is presented to someone leaving the crater of Osrakum and having passed through the Black Gate. Ahead looms the Blood Gate sitting on its ‘island’ rock. Running up from the foreground, on the left, is the chasm of the Cloaca that divides on either side of the rock. Two bridges cross to the rock from either side of the canyon floor. Ahead rises the ‘homeward’ gates between the two towers that comprise the Blood Gate. Beyond, to the left, can be glimpsed the Killing Field. Rising to either side are the vast Canyon walls