Chapter: The Mirror Breaks
Information relevant to the 12th chapter of The Mirror Breaks
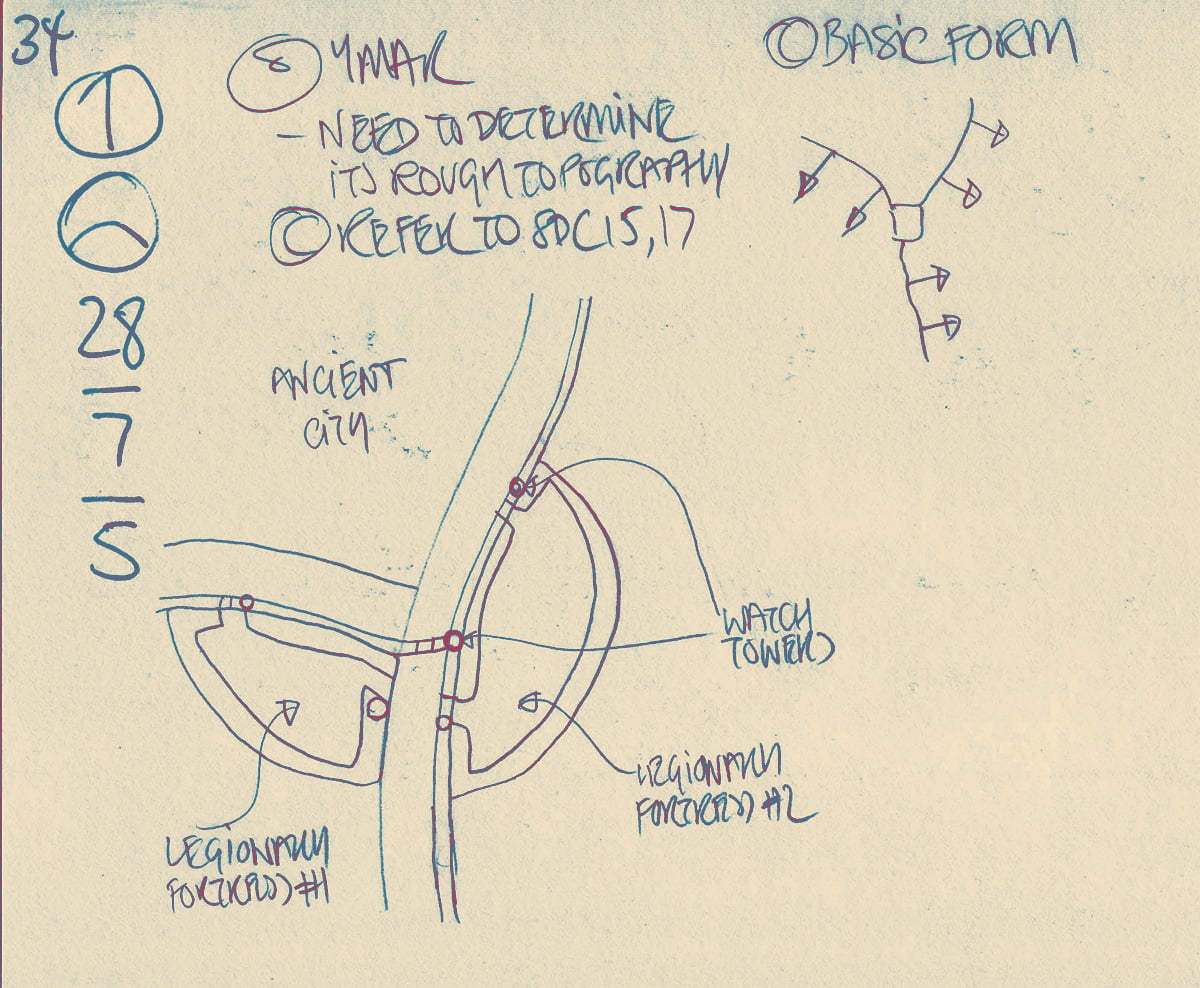
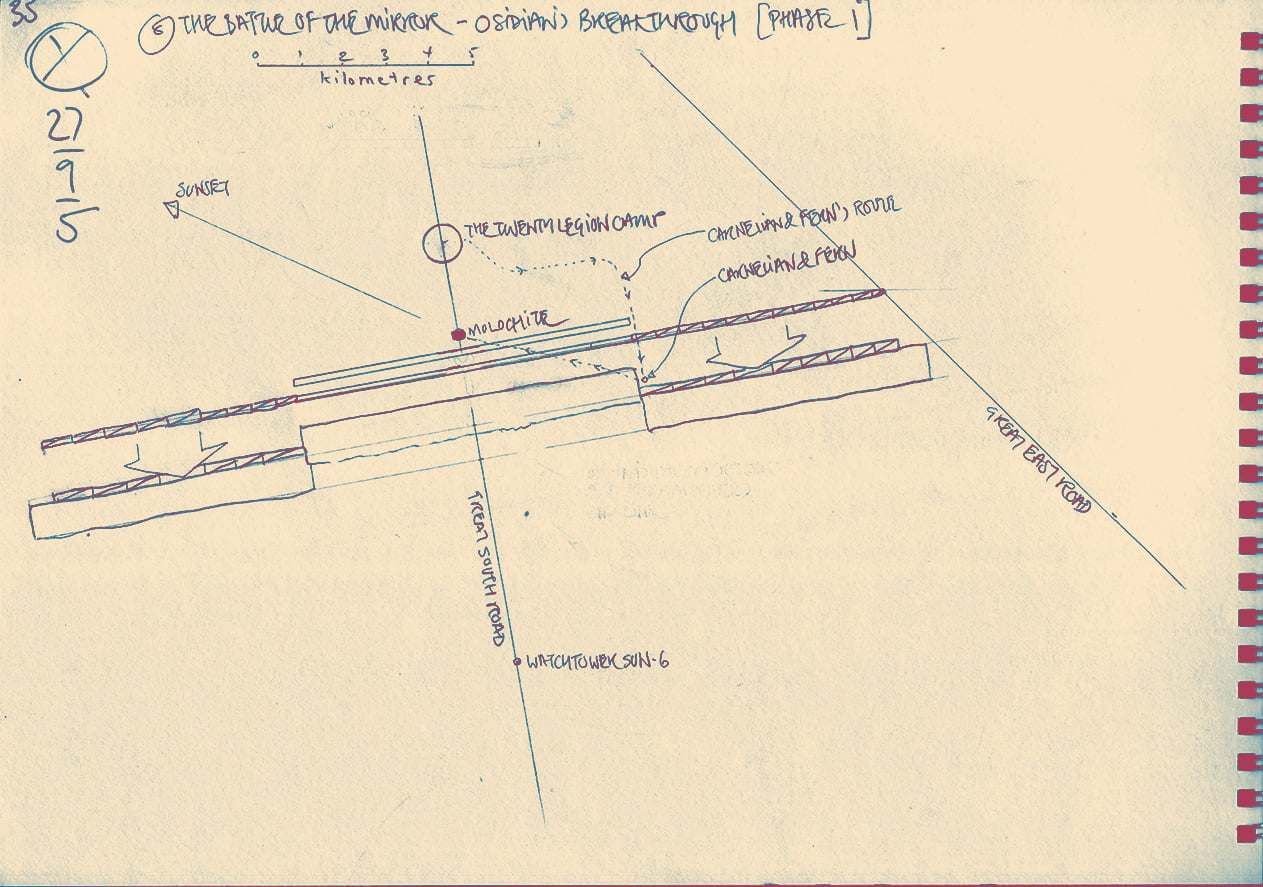
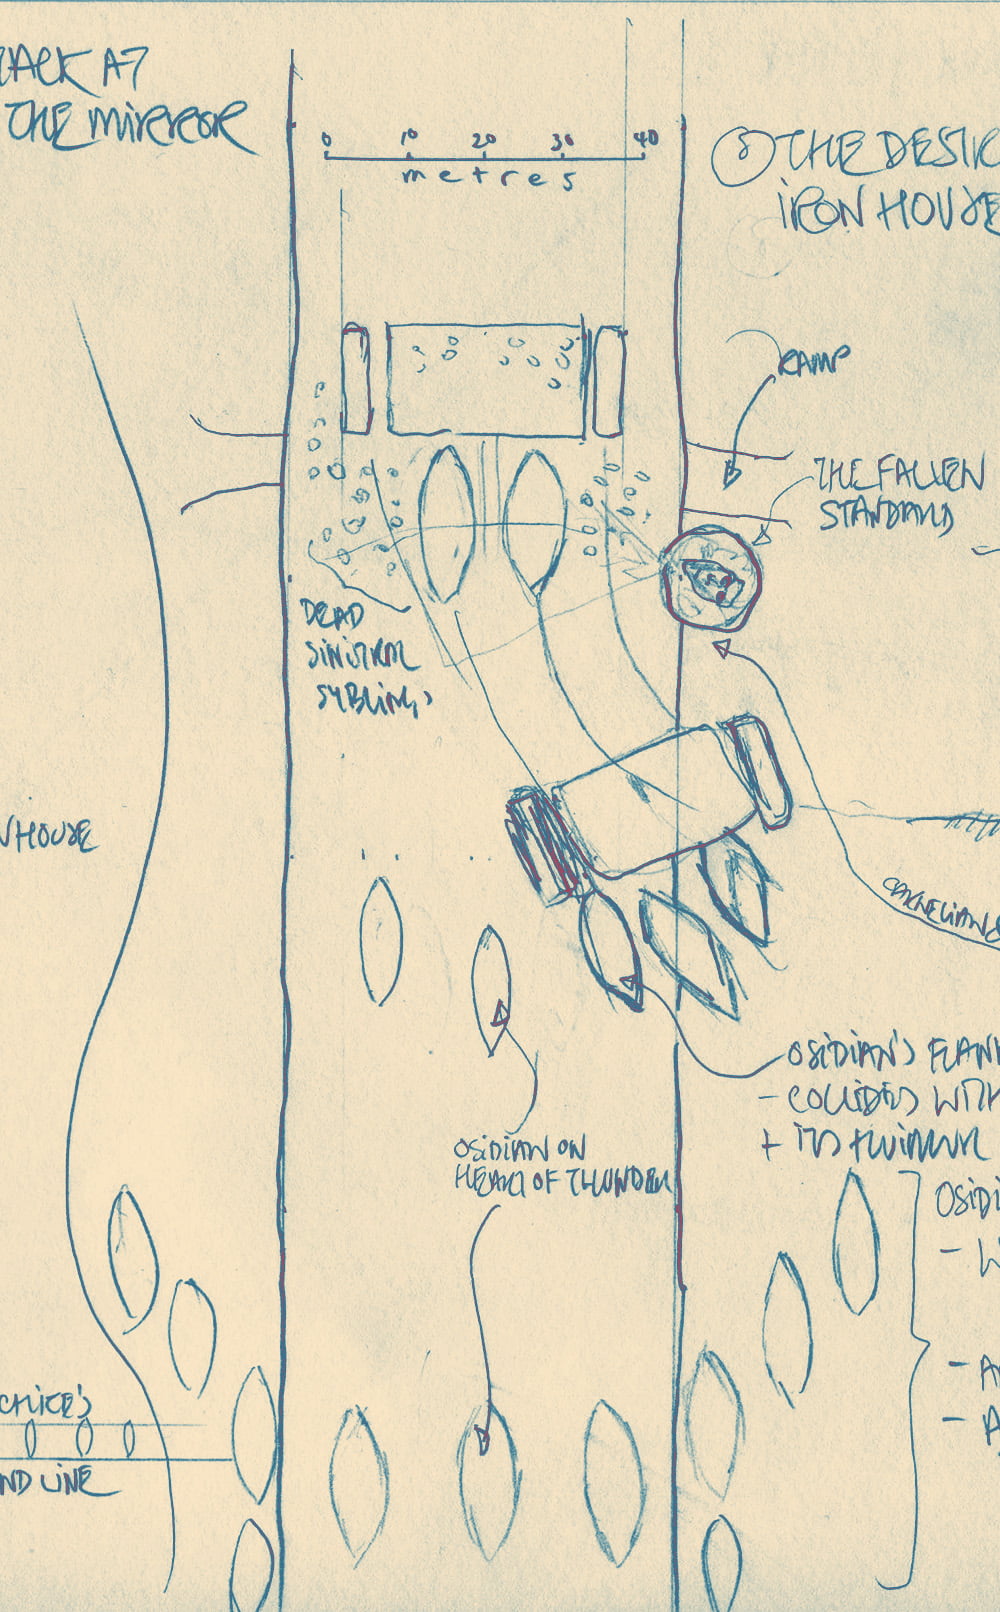
the Battle of the Mirror
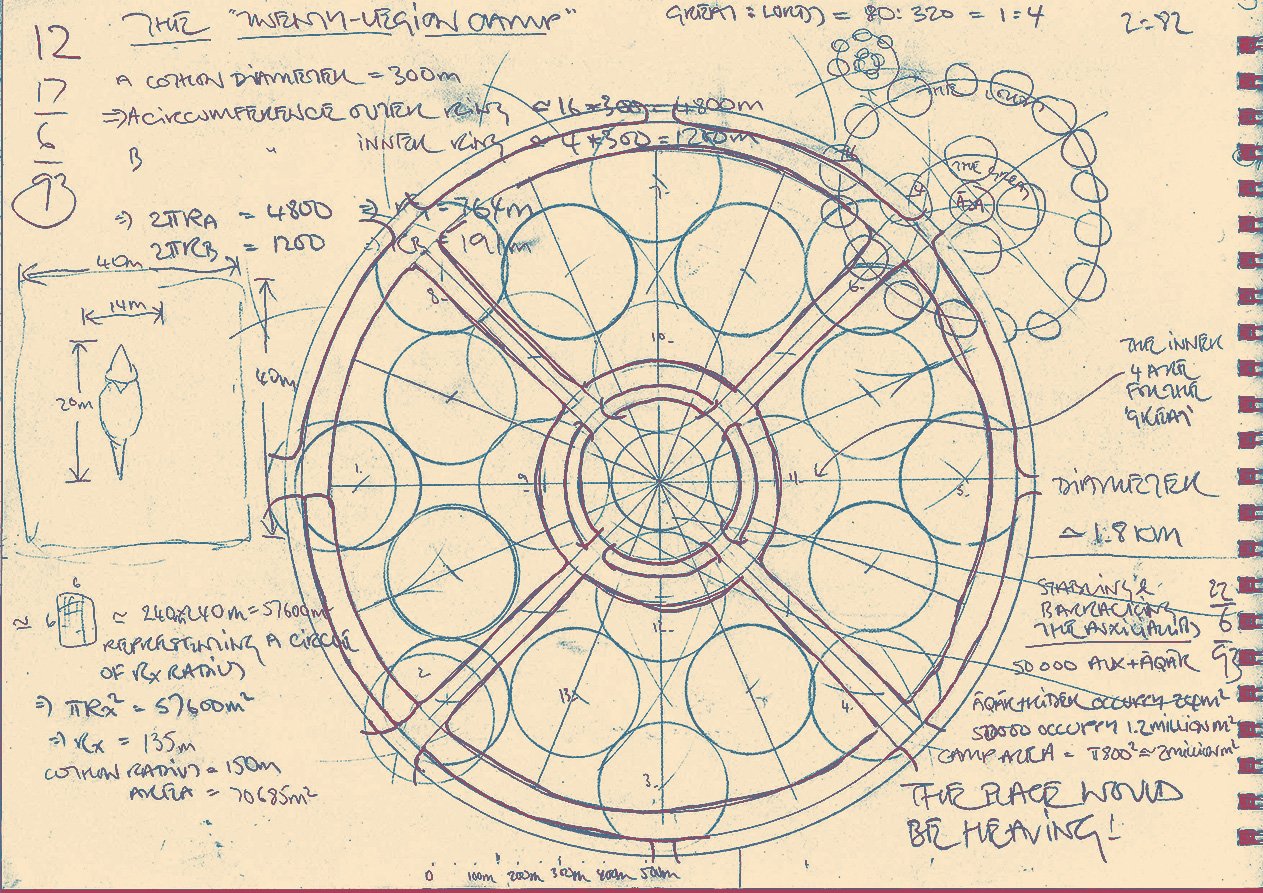
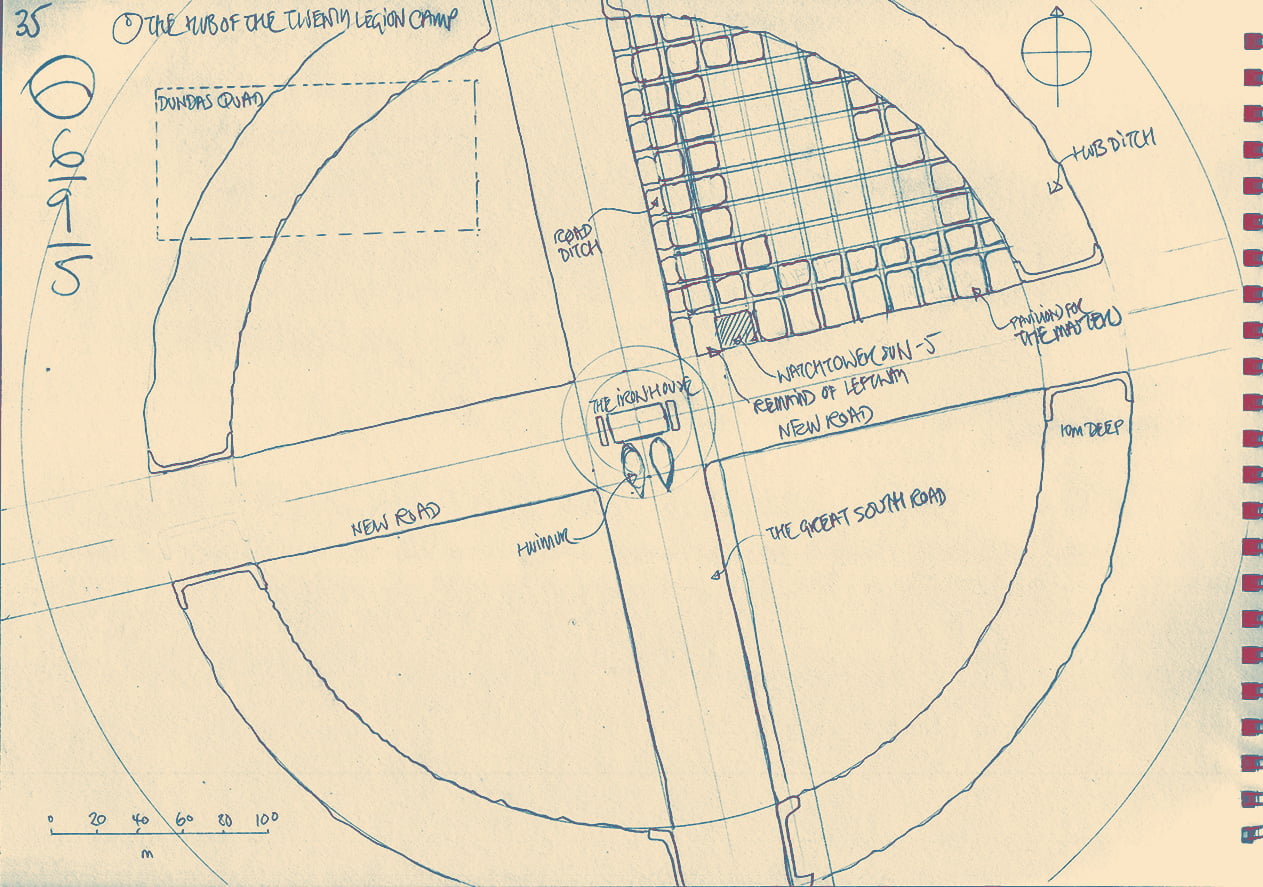
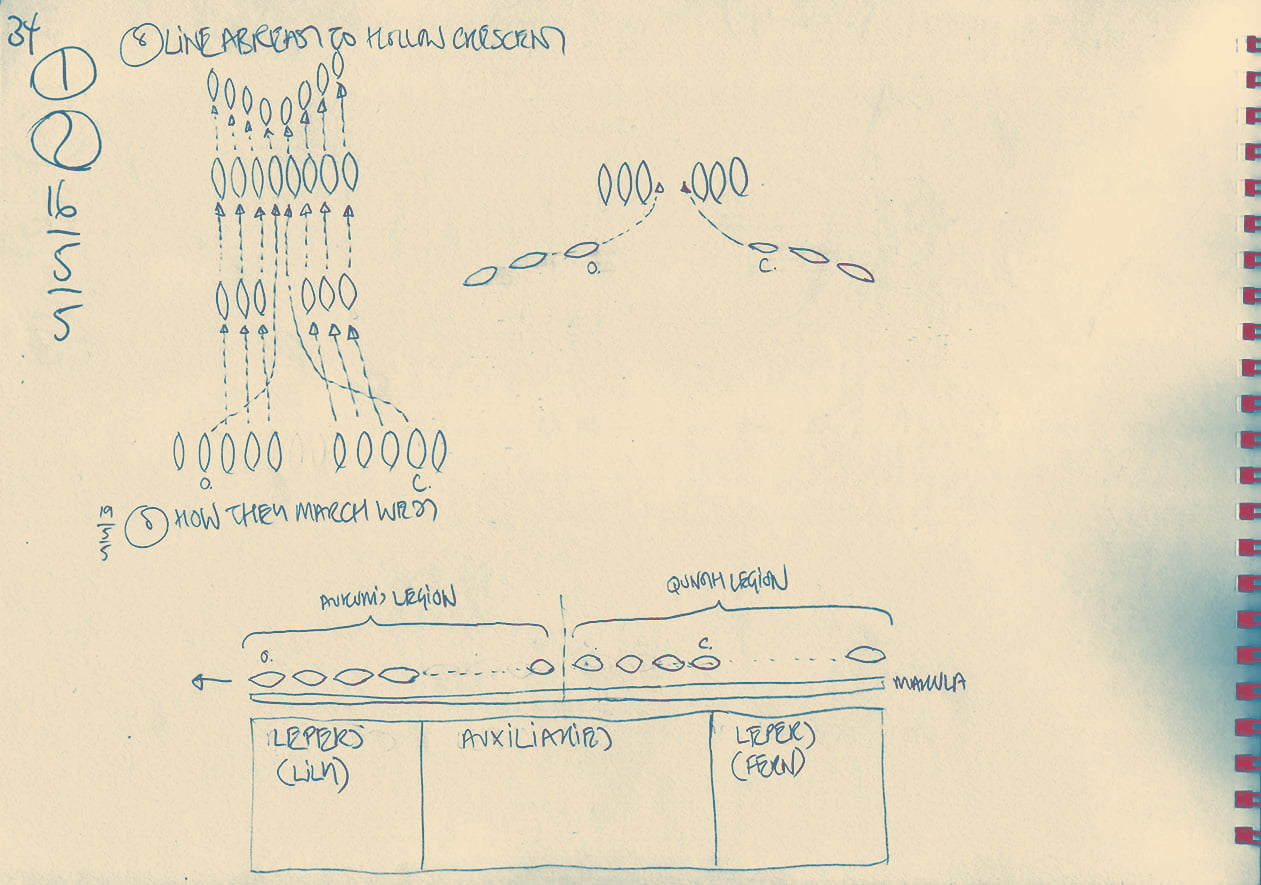
Phase 1: Molochite’s twenty legions deploy from his camp: his dragons in two lines in the centre and his auxiliaries on the flanks. His location is shown in the Iron House. Osidian’s sartlar millions form immense blocks. Molochite’s auxiliaries charge into them forcing Osidian’s flanks to halt, but his centre continues to advance towards Molochite’s dragons. Carnelian and Blue’s movement are shown as a dotted line running from the Twenty Legion Camp into combat
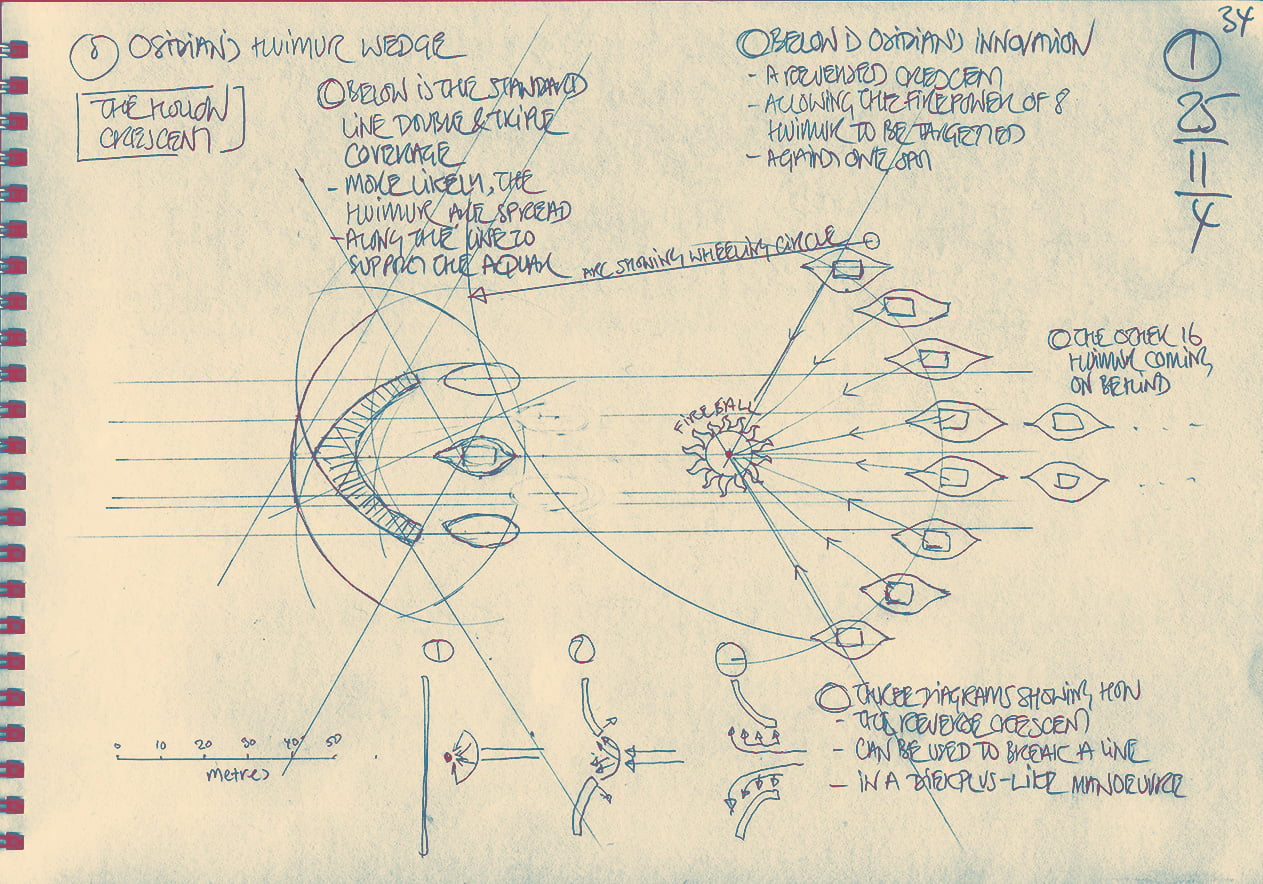
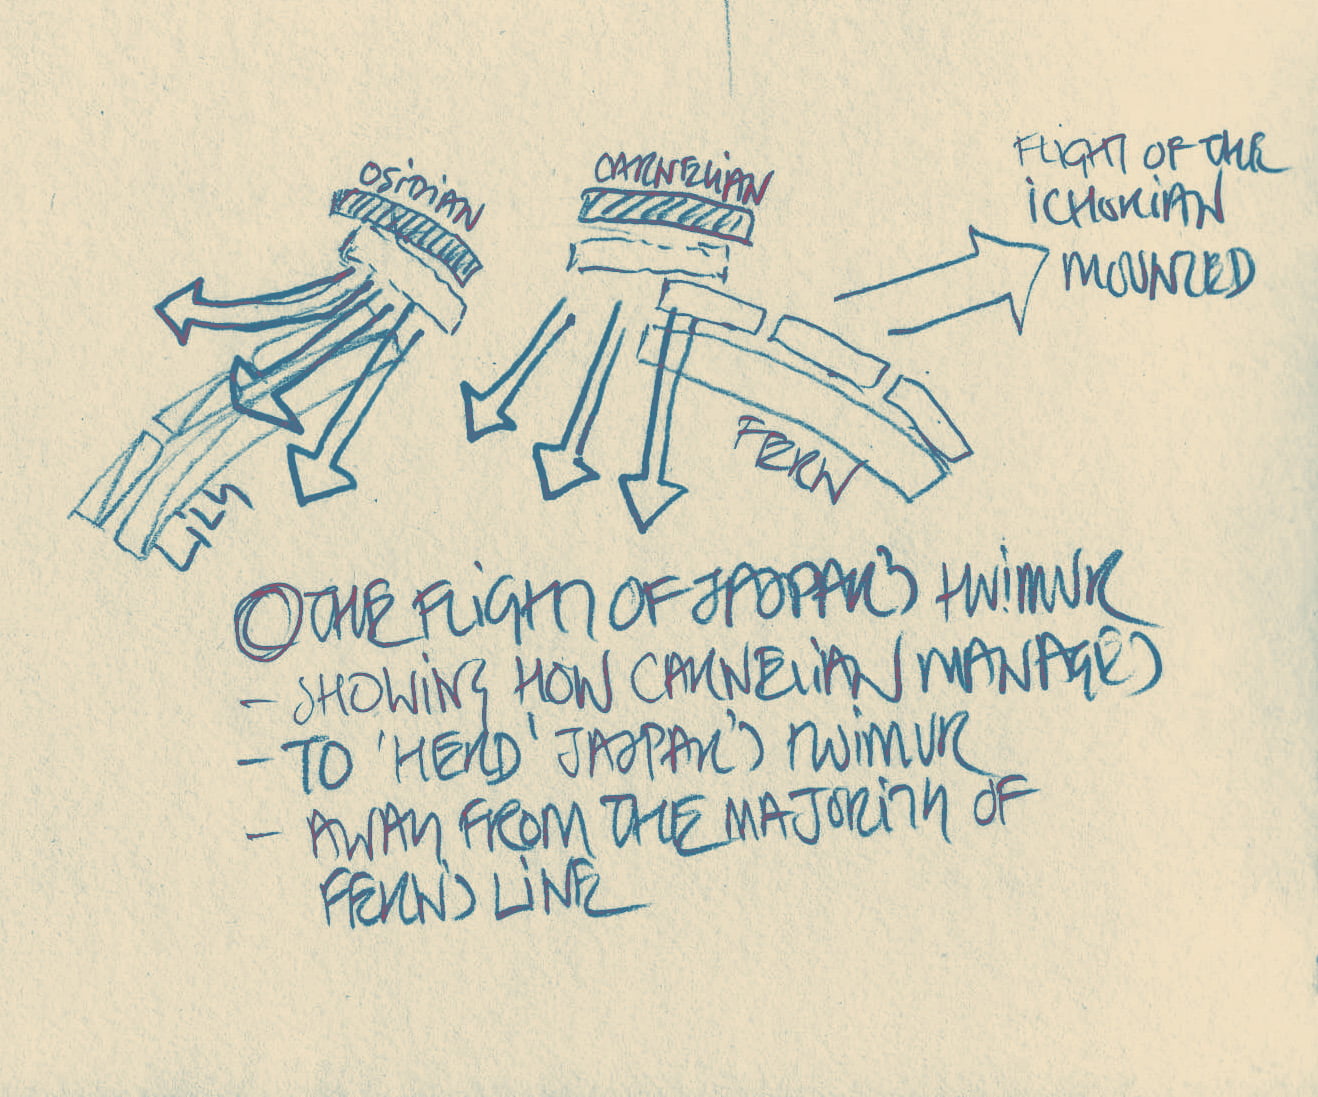
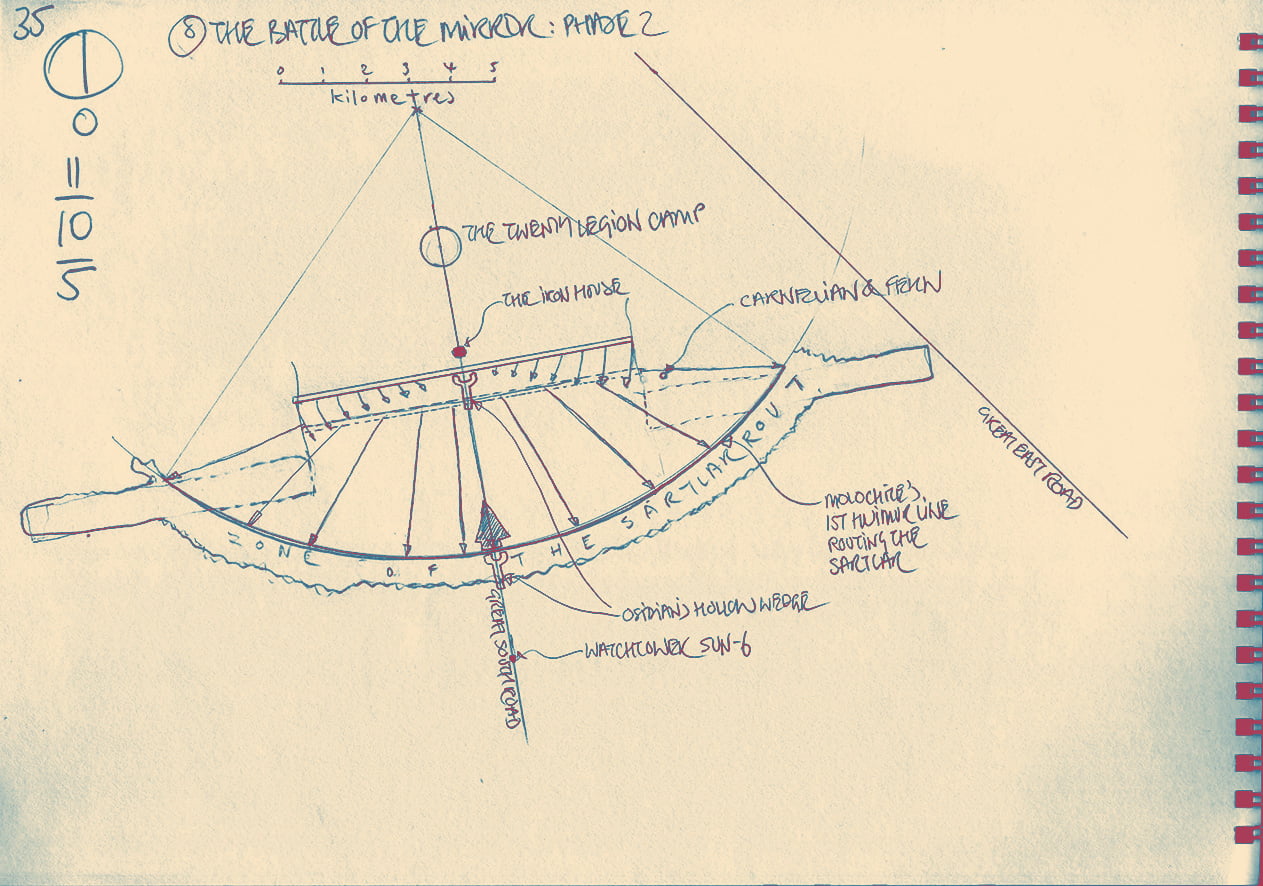
Phase 2: The sartlar are in rout across the breadth of the battlefield, as Molochite’s first line of dragons pursue them with fire and the thunder of their crushing feet. Osidian’s hollow crescent and column (shaped like a spanner) can be seen punching through the sartlar flight—as well as Molochite’s strung-out first line of dragons—heading for the centre of the second line. Osidian’s dragon formation can also be seen striking that centre. Too late, Molochite’s line folds in, like a hinge centred on the Iron House, trying to strike at Osidian
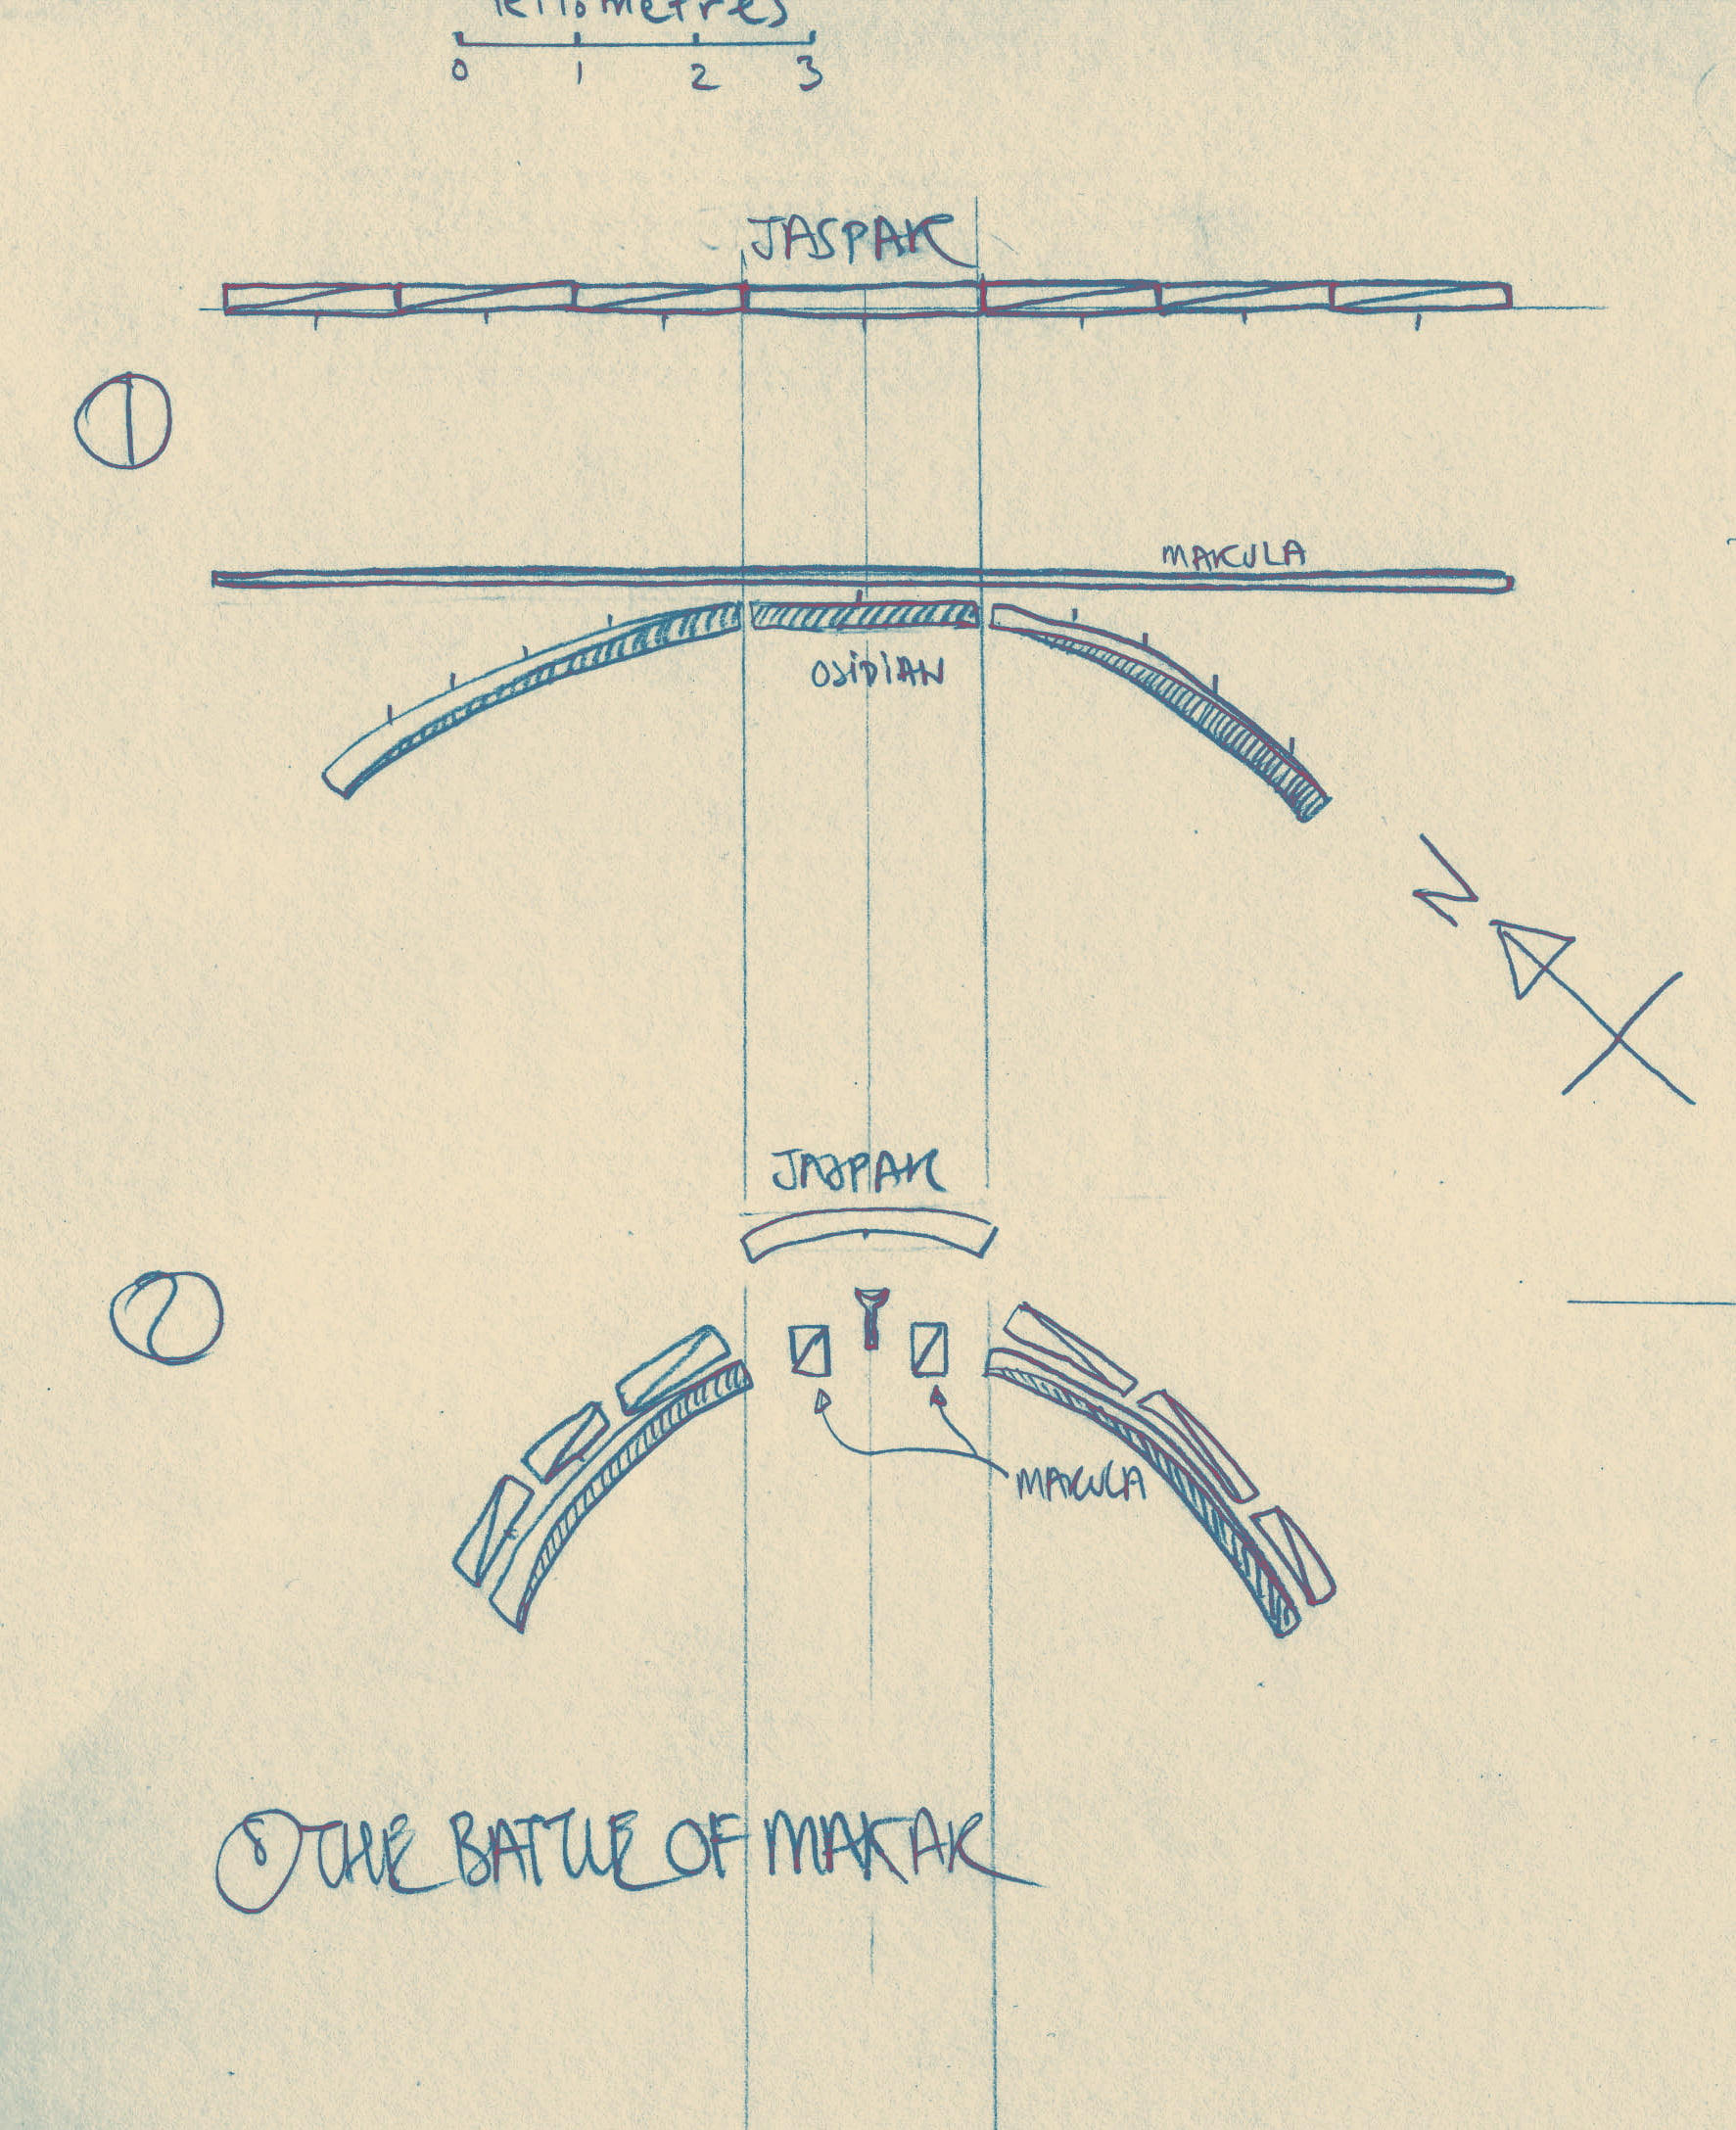
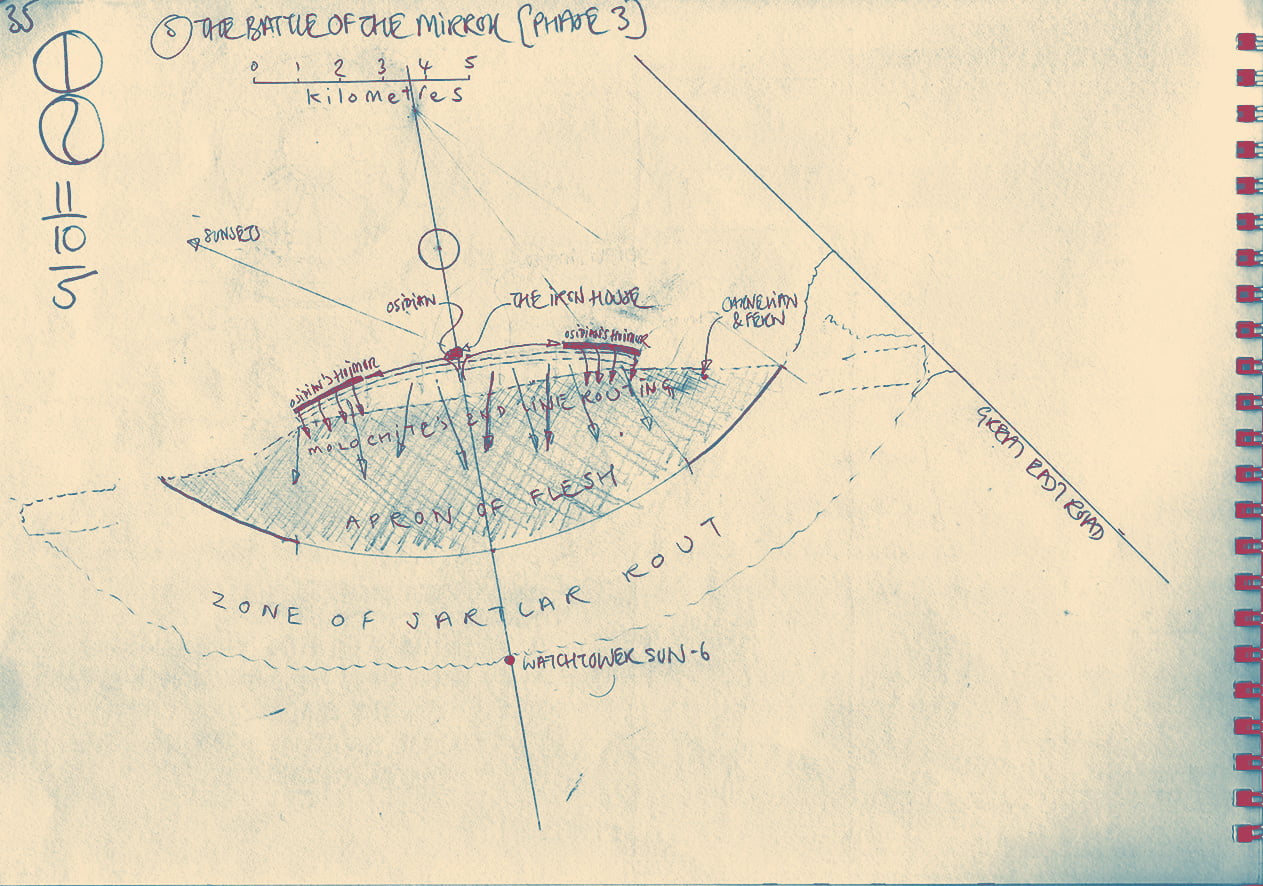
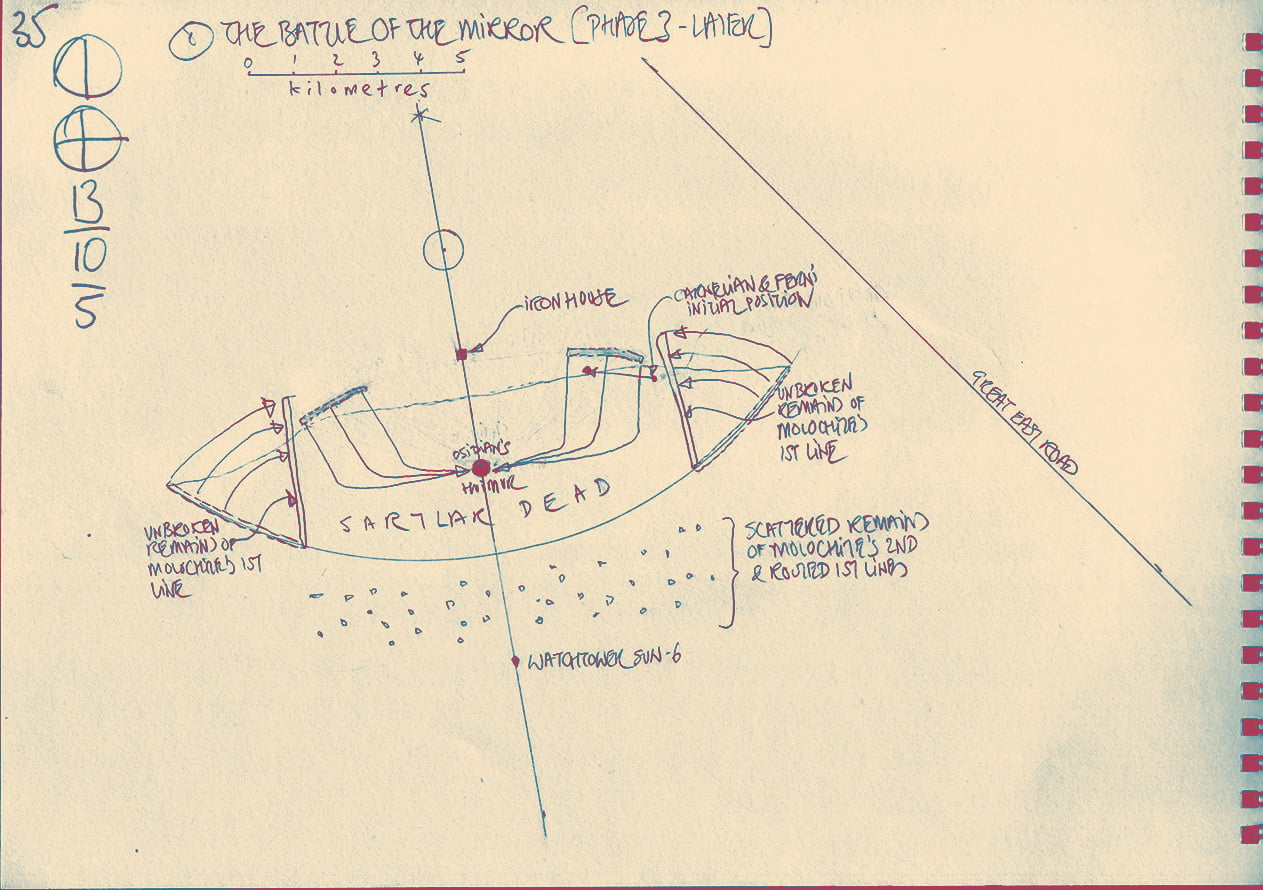
Phase 3: The latter part of the battle. The sartlar rout has spread out in a vast arc, leaving the dragons of Molochite’s first line dispersed across the battlefield. Osidian’s dragons—having broken through the centre of Molochite’s second line and in a repeat of what happened at the Battle of Makar—run along behind them, spurting fire over their defenceless rears. The dragons of the second line flee the flame, their towers exploding, dying from terrible burns, crashing through and trampling the mounds of piled up sartlar—among which Carnelian and Blue are located. Meanwhile, Osidian on Heart-of-Thunder torches the Iron House
Phase 4: At the end of the battle, Osidian regroups his dragons on the Great South Road at the centre of the battlefield. Those dragons of Molochite’s first line, that are not involved in the flight of the second, regroup in two lines facing Osidian. Meanwhile, Carnelian and Blue plod towards the burning Iron House
the aftermath of the battle
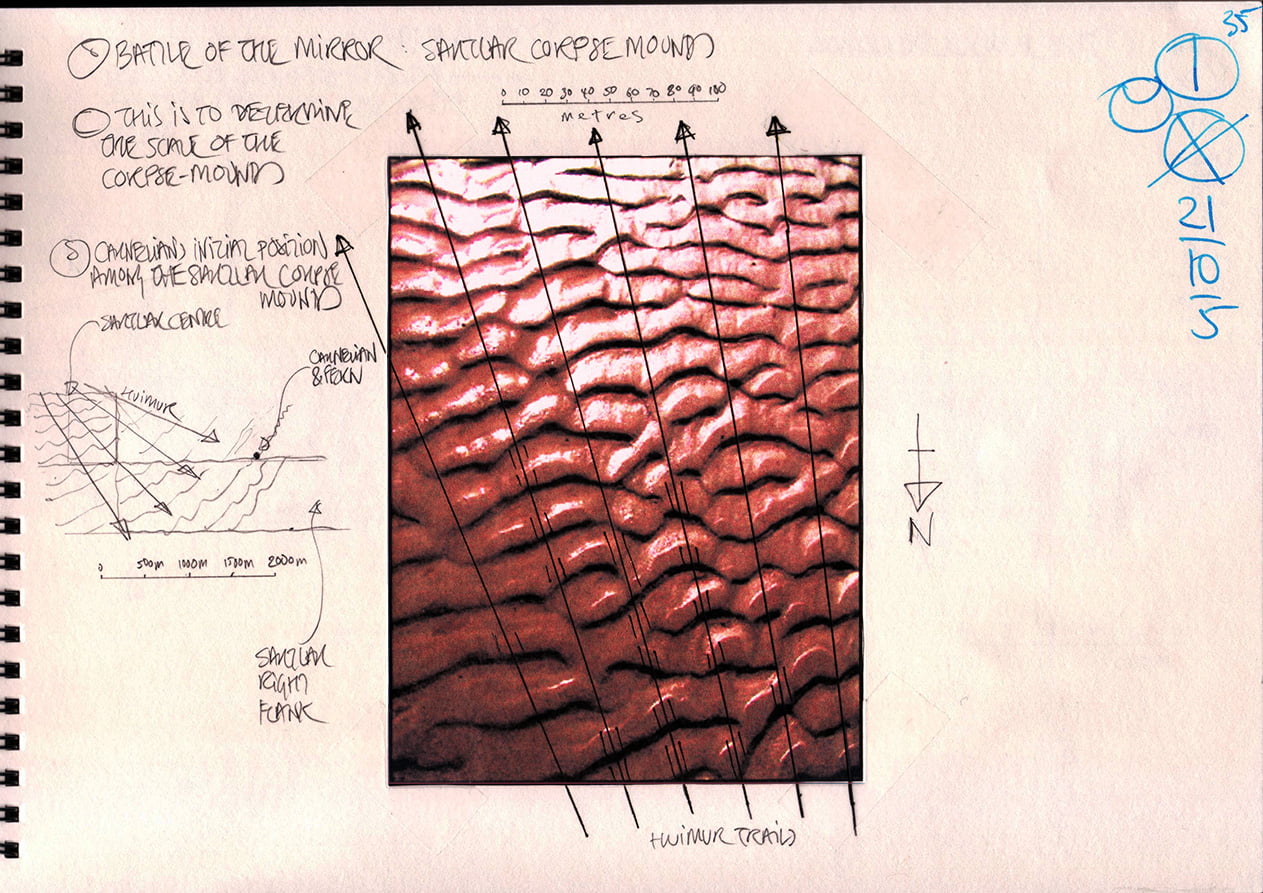
corpse mounds
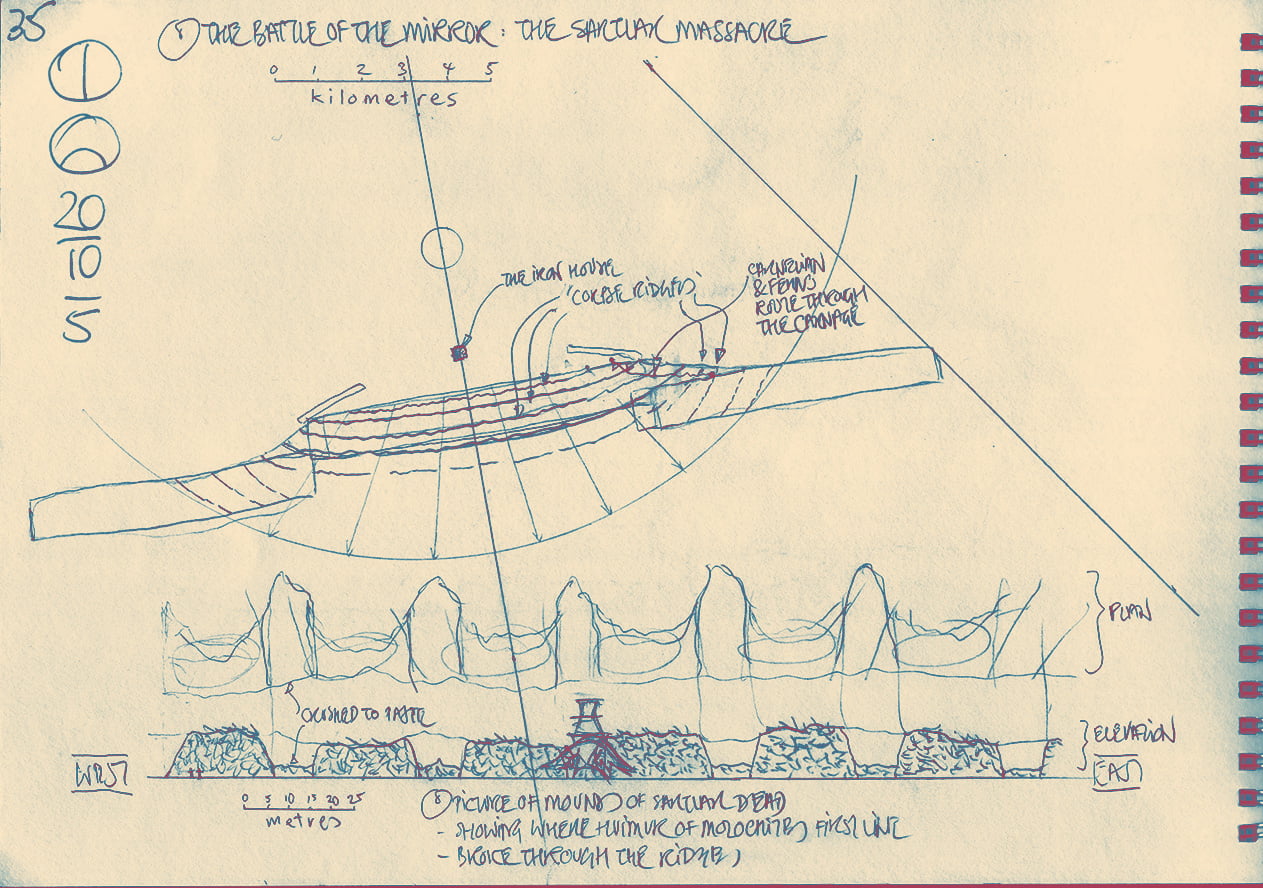
To my horror, as I came to understand the battle, I realized that—in their blind panic—the sartlar—attempting to flee from the fiery holocaust and thunder of the advance of Molochite’s dragons—were going to fall over each other. Their millions, so densely packed, could not hope to get out of the way of their fellows coming at them from the front. As one group fell, others would trip over them, or scrabble over the mounds to, in turn, founder on the growing hills of the dead and dying. The effect of this is like that that the sea, receding, produces on sand—ripples, ripples of corpse many metres high
The dragons of Molochite’s first line coming on behind, would crush their way through the corpses… but those of the second line, maddened by the fire burning on their backs and flanks, would run aground like ships on rocks
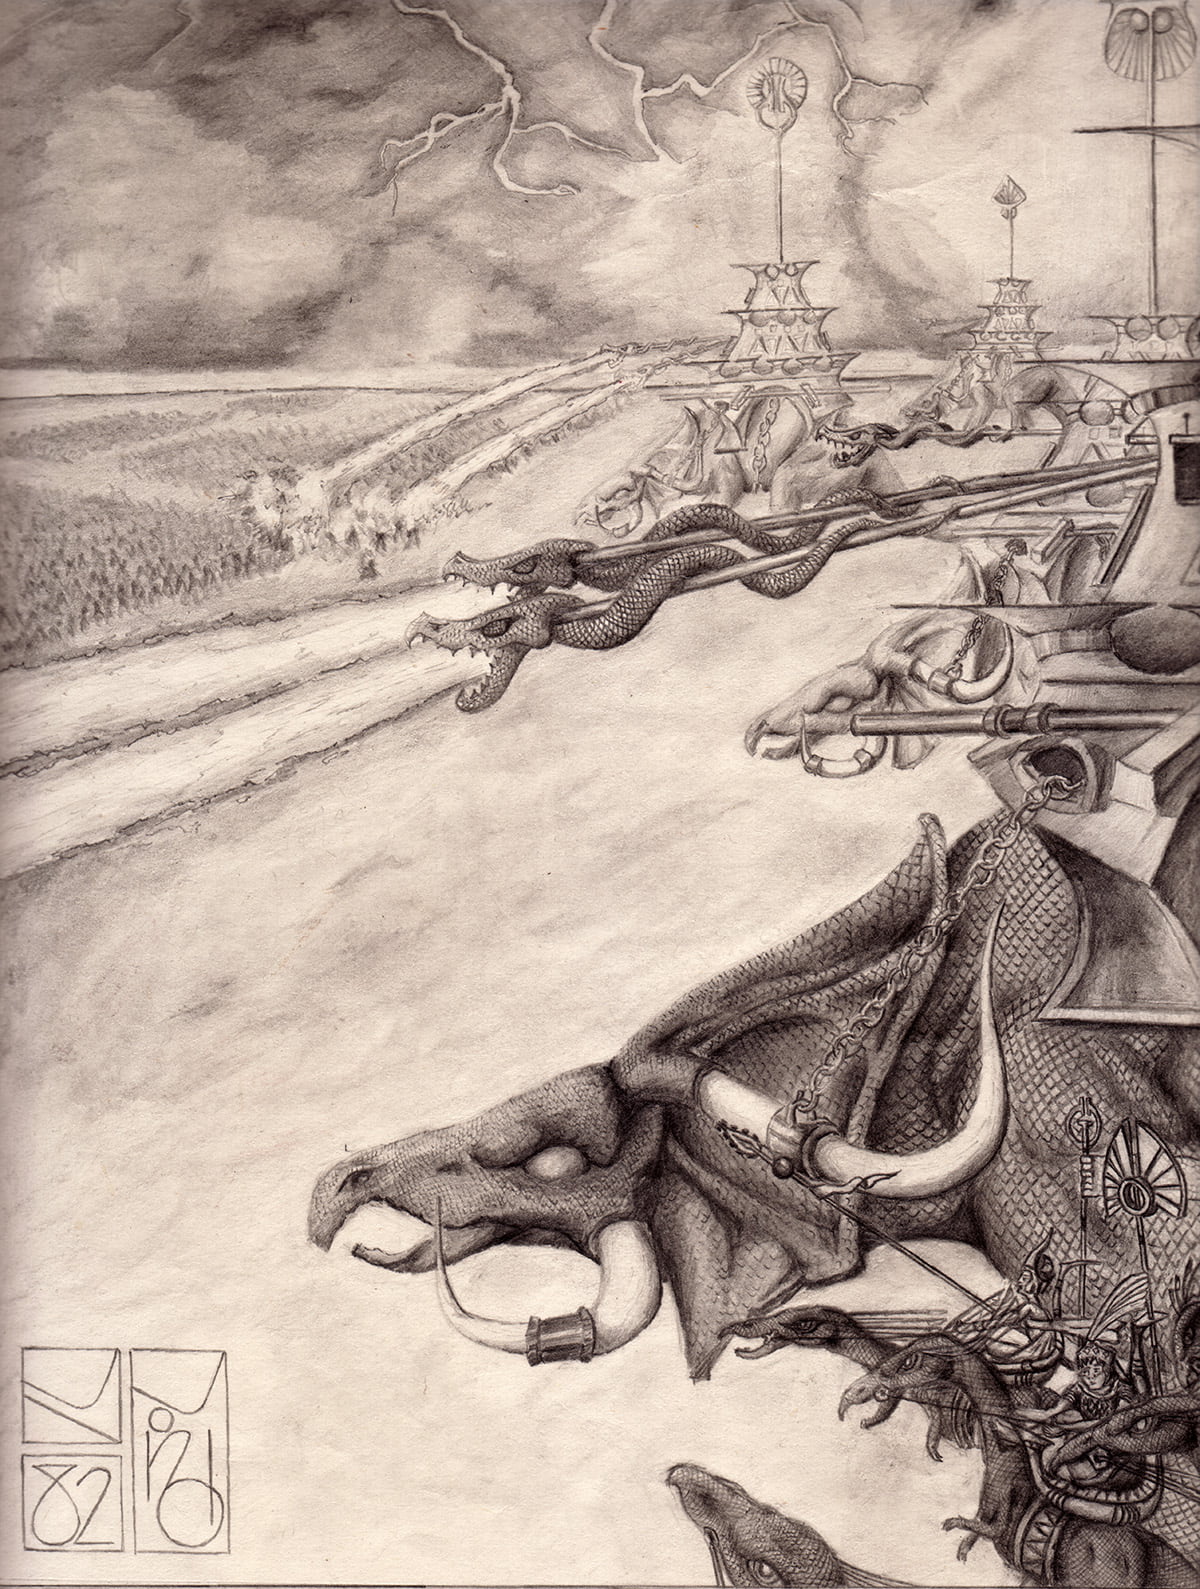
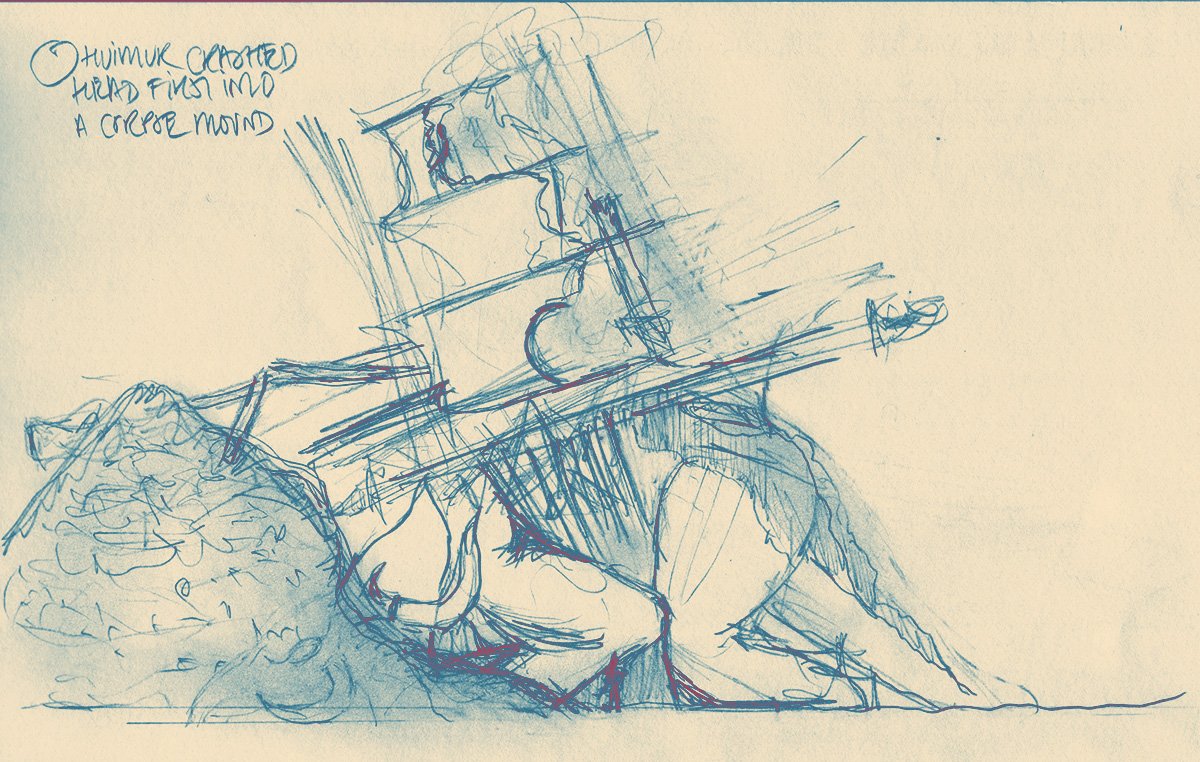
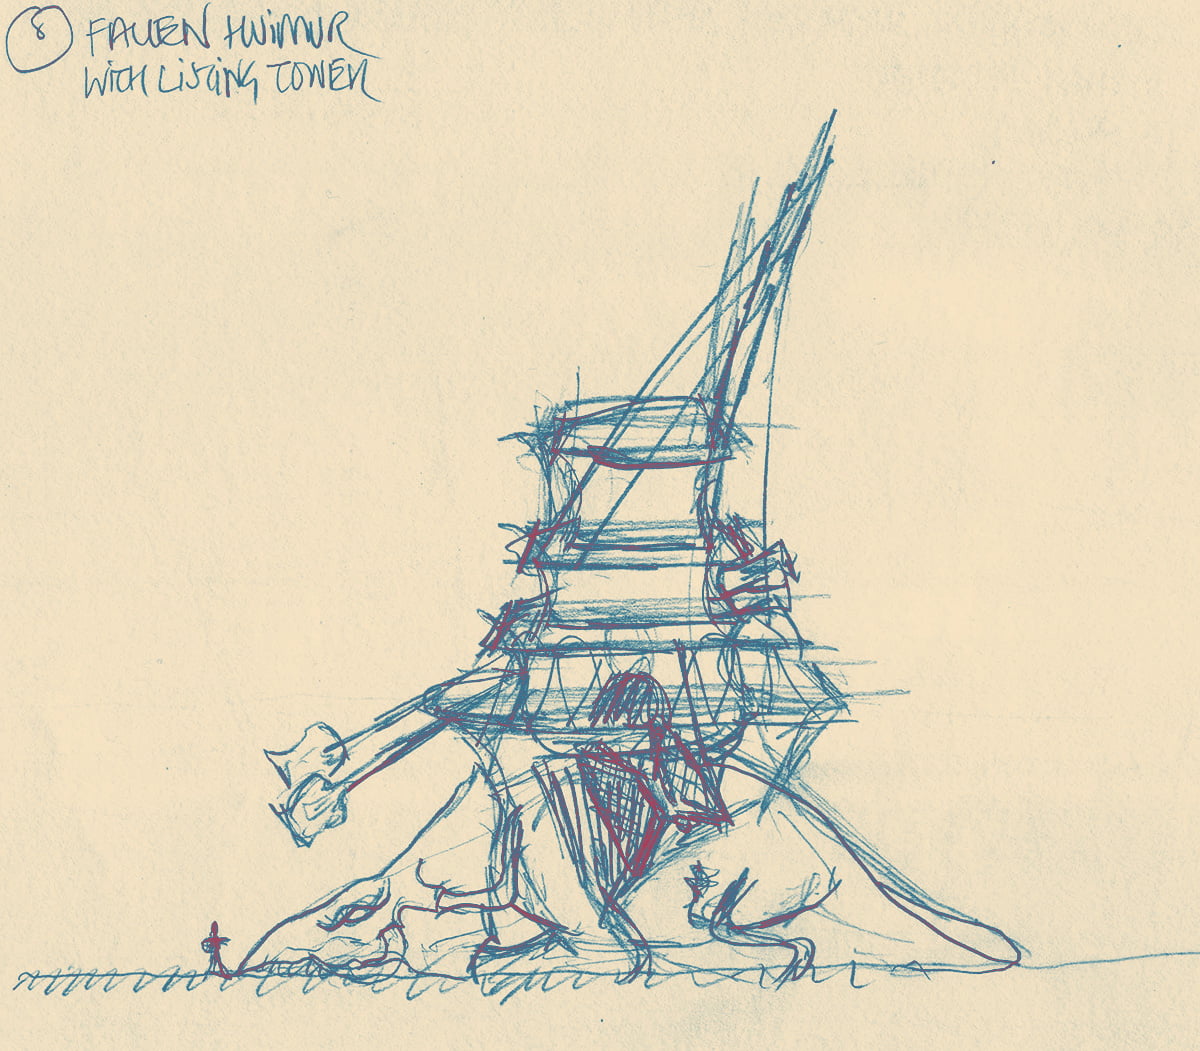
fallen dragons
The dragons of Molochite’s second line—with tower and hide set alight by Osidian’s flamepipes—crash, maddened with pain, through the labyrinth of the sartlar corpse mounds. Eventually the fire kills them, so that they fall where they stand
I made these two sketches to better understand some scenes that appear in the book. You will recognize which scenes these illustrate
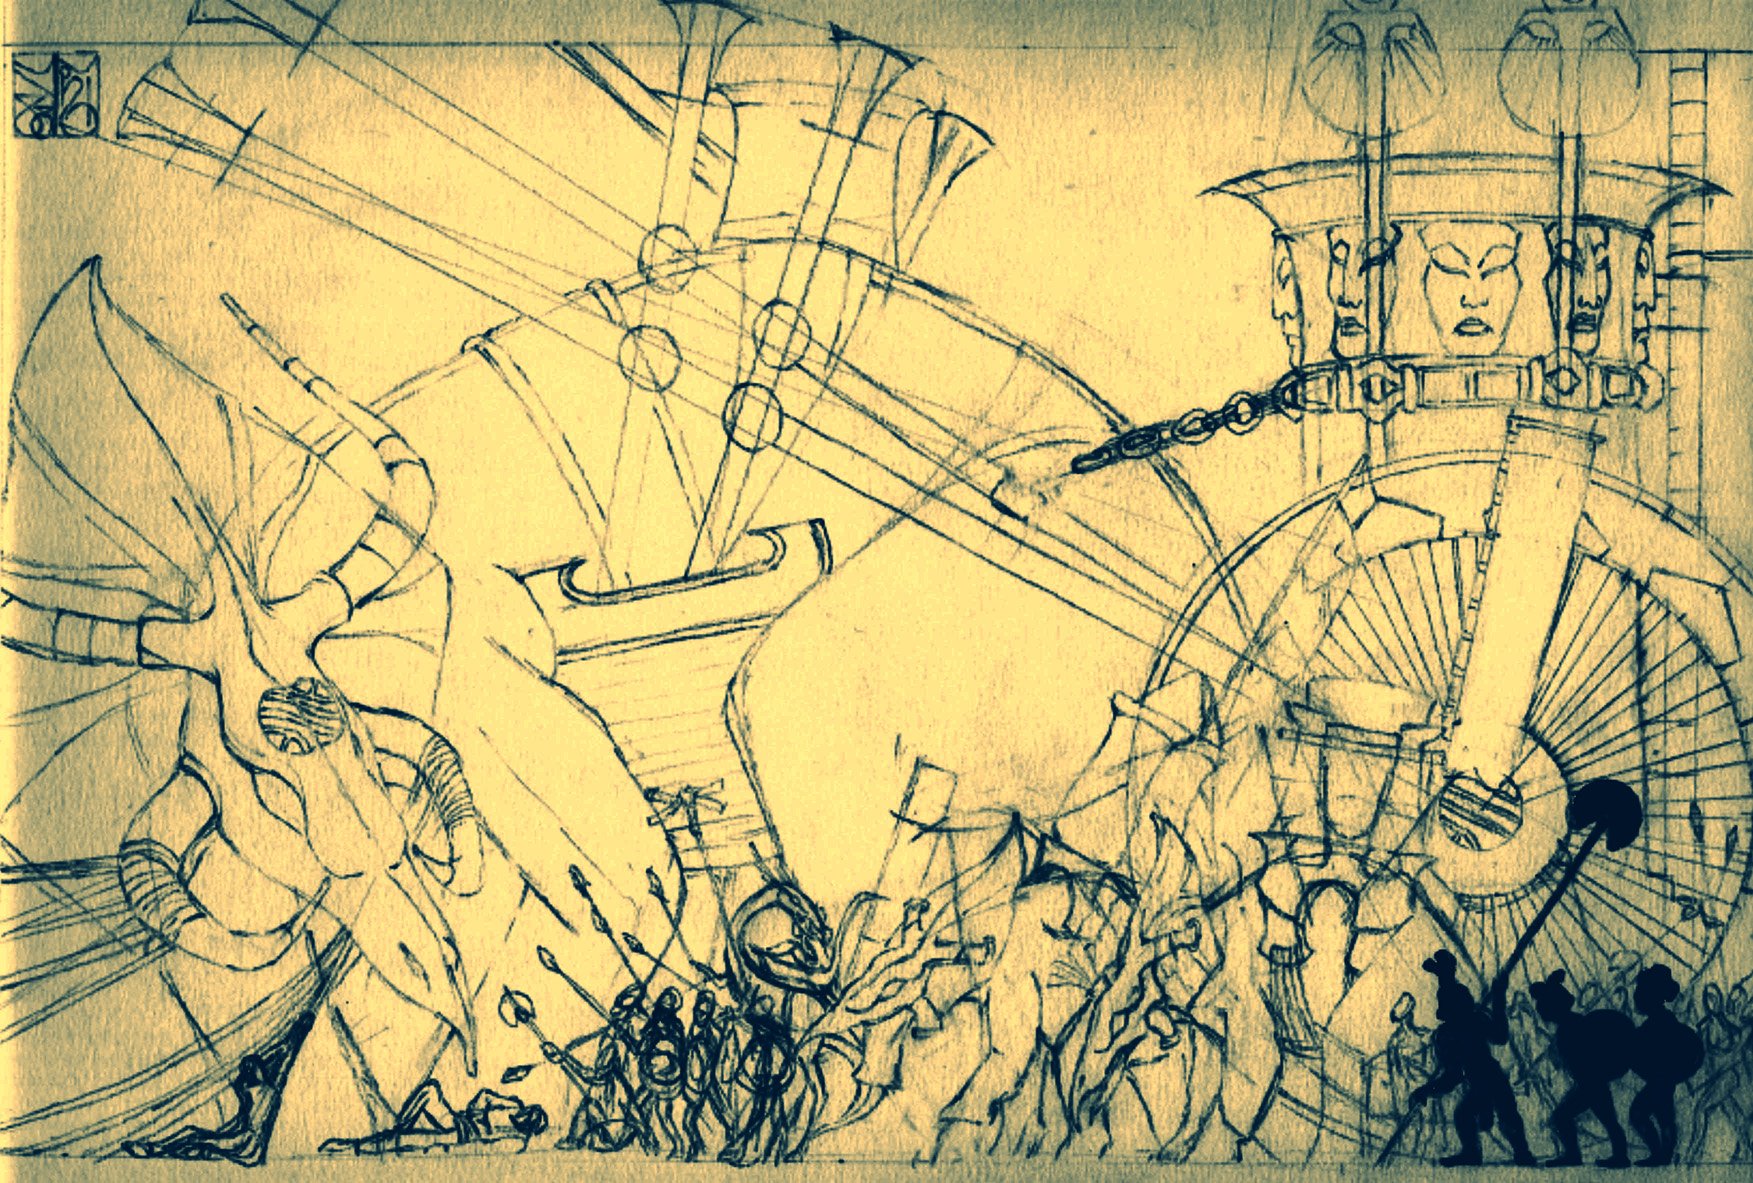
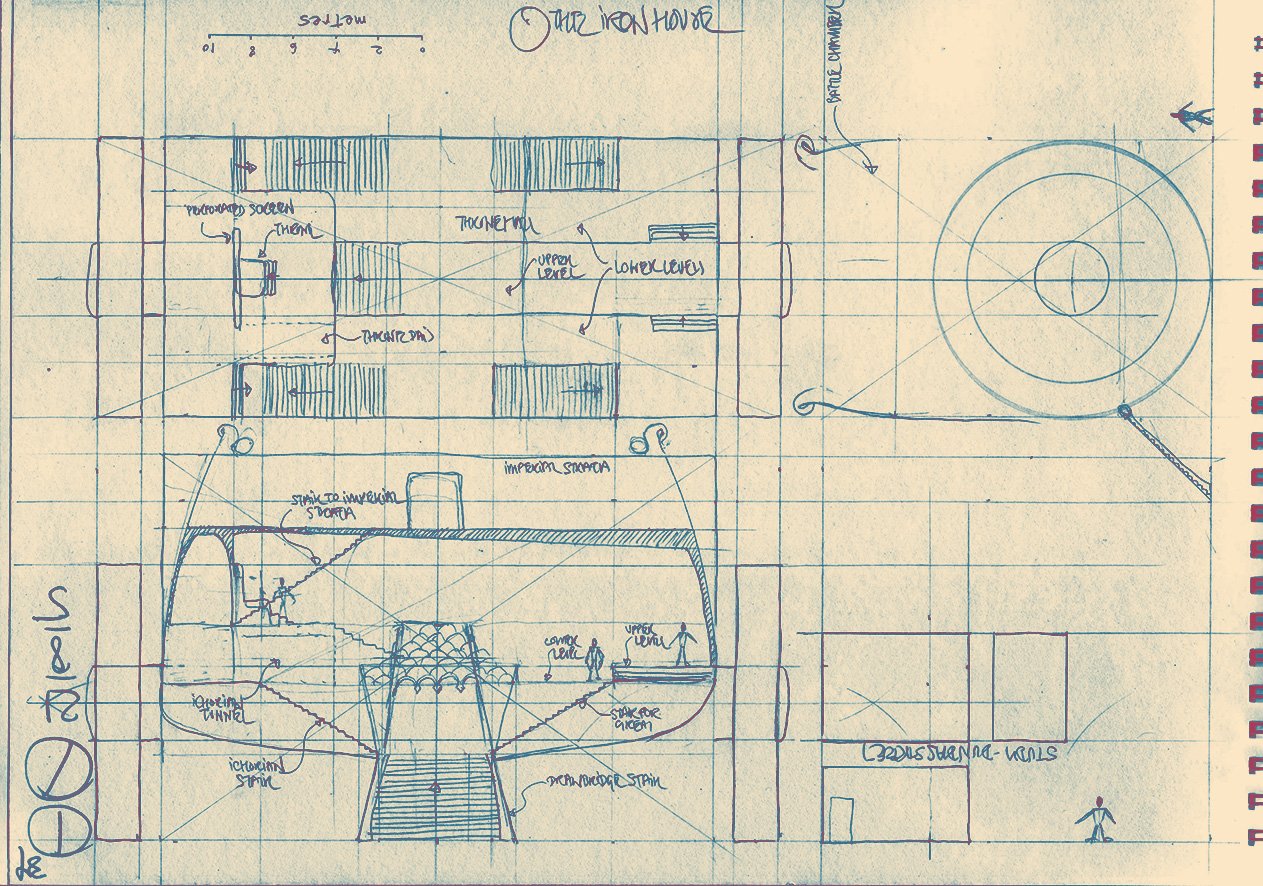
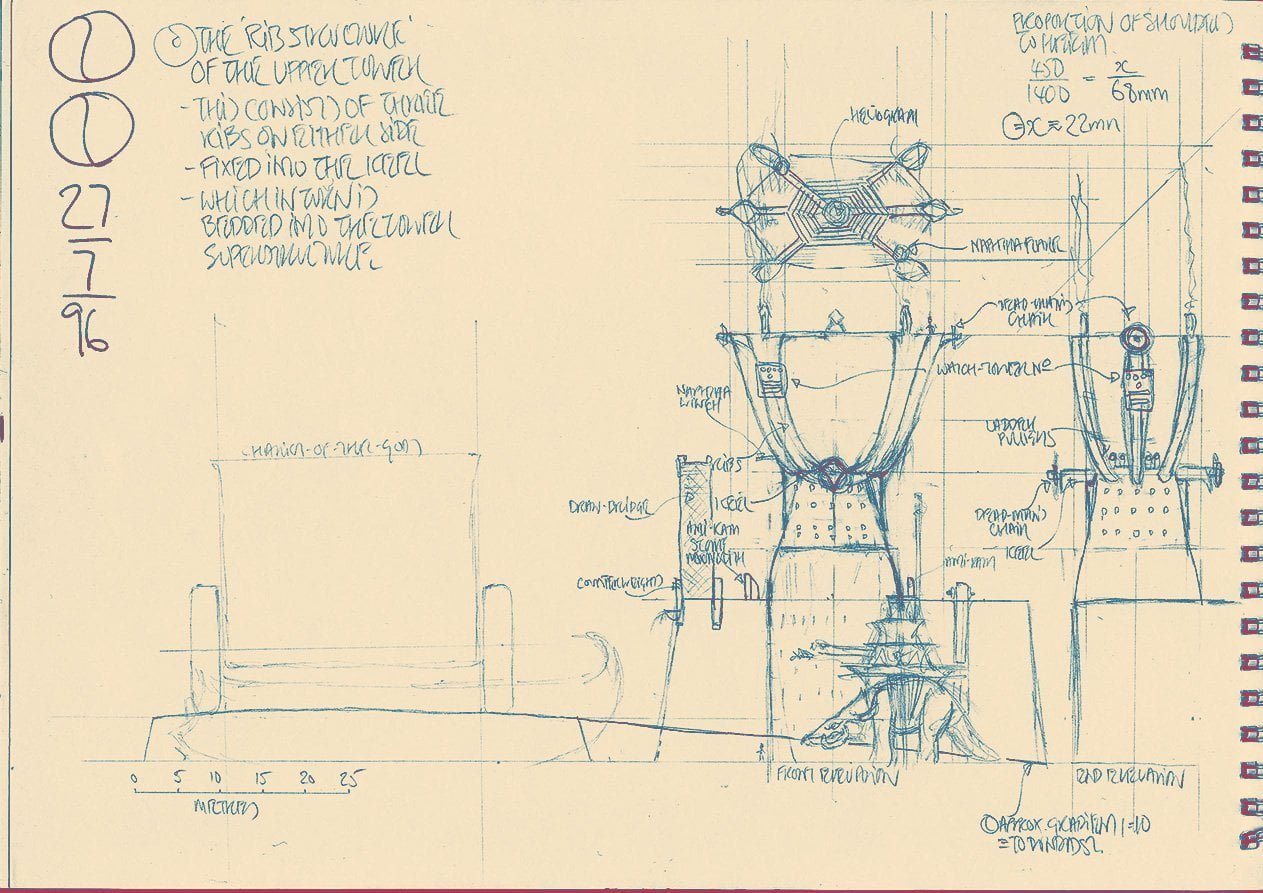
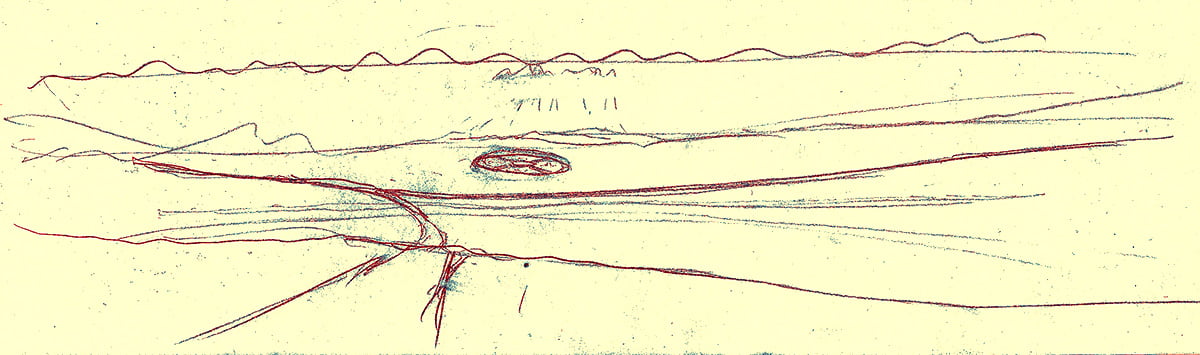
the wreck of the Iron House
The first sketch shows Carnelian and Blue standing before the wreck of the Iron House
It has come off the road—the two dragons that pulled it, having tumbled to the ground, one of the wheels of the chariot having buckled as it fell. One of Osidian’s dragons is still on the road, lying where it fell on the other wheel. The standard of the Green God can be seen lying upside down leaning against the road. It is in the space underneath that Carnelian and Blue seek shelter from the rain
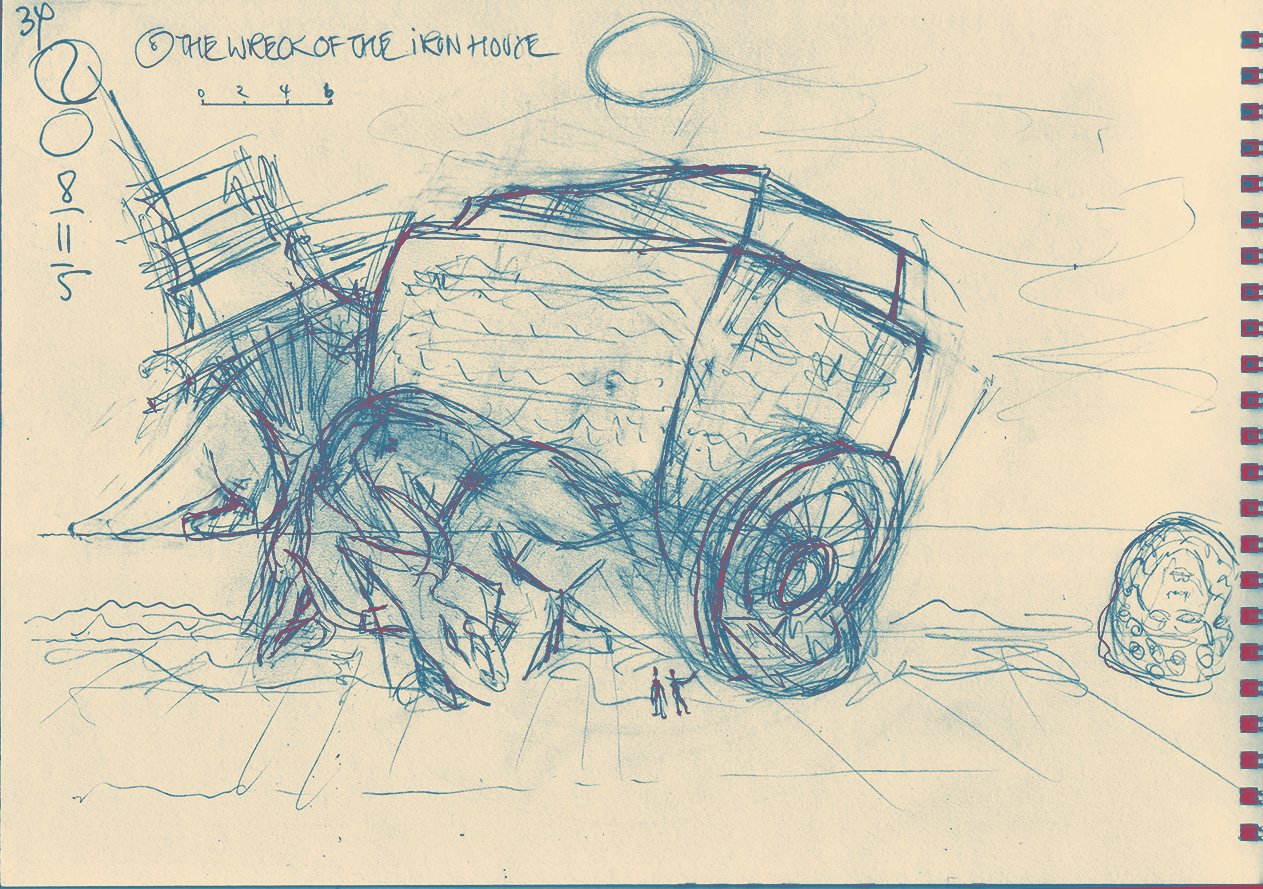
The second sketch shows Osidian’s attack coming along the road. The fire from his flamepipes causes the Iron House to swerve off the road
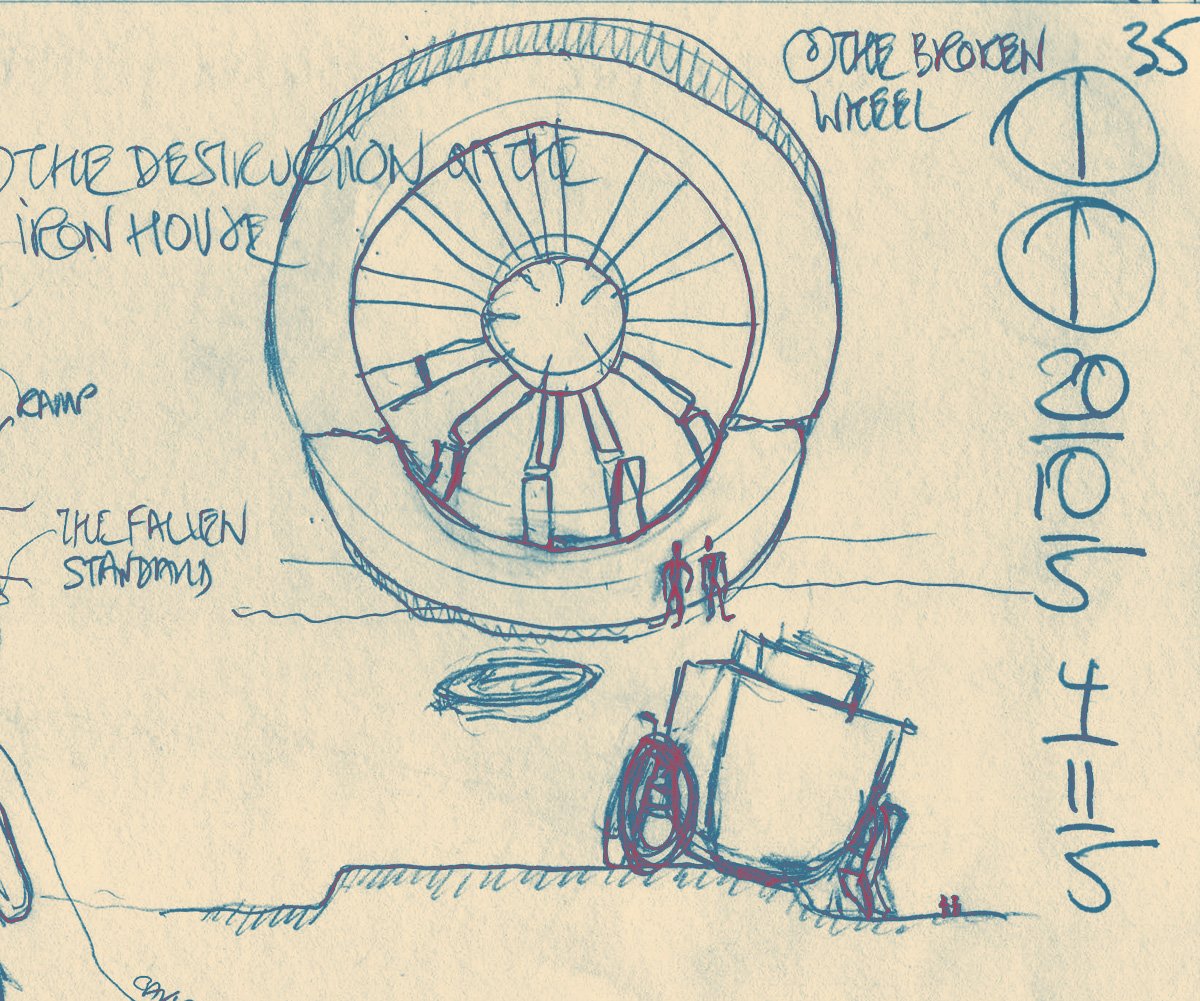
The third sketch shows Carnelian and Blue standing before the wheel of the Iron House that buckled when it came off the road and hit the earth. The boss from its hub lies like a bowl on the ground.
There is also a sketch of the Iron House half off the road that was a precursor to the more detailed sketch above. This kind of ‘storyboarding’ helped me visualize a scene before I wrote it